There’s something almost magical about that first bite of a perfectly crafted chocolate dessert—the way it melts on your tongue, releasing layers of complex flavors and giving you that moment of pure bliss. As someone who has spent countless hours perfecting chocolate recipes in my home kitchen and professional settings, I can tell you that few desserts capture this magic quite like a Triple Chocolate Mousse Cake.
This isn’t just any chocolate cake. It’s a symphony of textures and intensities—a chocolate lover’s dream come true. I’m excited to share with you my ultimate version that has delighted friends, family, and even the most discerning chocolate connoisseurs at dinner parties.
The Magic of Layered Chocolate
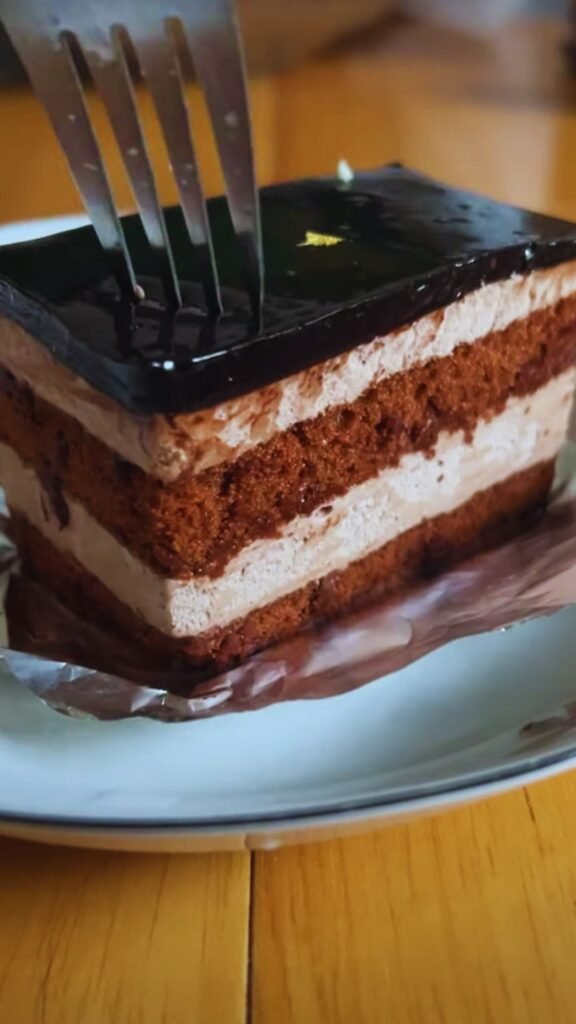
What makes this dessert special is the careful balance of three distinct chocolate layers, each with its own personality but working in perfect harmony. When you slice through this cake, you’ll reveal:
- A dense, fudgy dark chocolate cake base that provides a sturdy foundation
- A silky milk chocolate mousse middle layer that melts effortlessly
- A light, airy white chocolate mousse top that crowns the creation
The beauty of this dessert lies not just in its stunning appearance, but in the experience of tasting all three layers together. The intensity gradually shifts from the deepest chocolate notes to the most delicate, creating a journey for your taste buds.
Ingredients for Chocolate Excellence
Great chocolate desserts demand quality ingredients. Here’s what you’ll need to create this showstopper:
For the Dark Chocolate Base:
- 200g high-quality dark chocolate (70% cocoa solids)
- 150g unsalted butter
- 200g granulated sugar
- 4 large eggs
- 1 teaspoon vanilla extract
- Pinch of sea salt
- 130g all-purpose flour
- 30g unsweetened cocoa powder
For the Milk Chocolate Mousse Layer:
- 300g high-quality milk chocolate
- 500ml heavy cream, divided
- 3 tablespoons granulated sugar
- 4 large egg yolks
- 2 tablespoons water
- 7g powdered gelatin
- 2 tablespoons cold water (for blooming gelatin)
For the White Chocolate Mousse Layer:
- 300g high-quality white chocolate
- 400ml heavy cream, divided
- 2 tablespoons granulated sugar
- 3 large egg yolks
- 2 tablespoons water
- 7g powdered gelatin
- 2 tablespoons cold water (for blooming gelatin)
For the Chocolate Ganache Glaze:
- 100g dark chocolate
- 100ml heavy cream
- 1 tablespoon glucose syrup (or light corn syrup)
- 1 tablespoon unsalted butter
Equipment You’ll Need
- 9-inch springform pan
- Parchment paper
- Electric mixer (stand or handheld)
- Several mixing bowls
- Saucepans and heatproof bowls for melting chocolate
- Rubber spatulas
- Whisk
- Offset spatula
- Digital food thermometer
- Sieve (for the cocoa powder and flour)
- Cooling rack
The Creation Process
Phase 1: The Dark Chocolate Base
- Preheat your oven to 325°F (170°C). Line the bottom of your springform pan with parchment paper and grease the sides.
- In a heatproof bowl over simmering water (not touching the water), melt the dark chocolate and butter together, stirring occasionally until smooth. Remove from heat and let cool slightly.
- In a large bowl, whisk together the sugar and eggs until light and somewhat fluffy, about 2 minutes.
- Gradually pour the melted chocolate mixture into the egg mixture, whisking continuously.
- Add the vanilla extract and salt, then sift in the flour and cocoa powder. Fold gently until just combined. Don’t overmix; this keeps the base fudgy rather than cakey.
- Pour the batter into the prepared springform pan and smooth the top with an offset spatula.
- Bake for 25-30 minutes. The center should be set but still slightly fudgy—a toothpick inserted should come out with a few moist crumbs. Don’t overbake!
- Let cool completely in the pan on a wire rack.
Phase 2: The Milk Chocolate Mousse
- Once the base is completely cool, prepare the milk chocolate mousse. Begin by blooming the gelatin: sprinkle it over 2 tablespoons of cold water in a small bowl and let stand for 5 minutes.
- Chop the milk chocolate finely and place in a large heatproof bowl.
- In a small saucepan, heat 200ml of the heavy cream until it just begins to simmer around the edges. Pour over the chopped milk chocolate and let stand for 30 seconds, then stir until smooth.
- In another small saucepan, whisk together the egg yolks, sugar, and 2 tablespoons of water. Cook over medium-low heat, whisking constantly, until the mixture reaches 160°F (71°C) on a thermometer. This creates a safe custard base.
- Remove from heat and immediately stir in the bloomed gelatin until fully dissolved.
- Pour this custard mixture through a fine-mesh sieve into the chocolate mixture and stir until well combined. Let cool to room temperature, stirring occasionally.
- In a separate bowl, whip the remaining 300ml heavy cream to soft peaks.
- When the chocolate mixture has cooled but is still fluid, gently fold in the whipped cream in three additions.
- Pour this mousse over the cooled chocolate base and smooth the top. Refrigerate for at least 1 hour until set.
Phase 3: The White Chocolate Mousse
- Repeat the blooming gelatin process with another 7g of gelatin and 2 tablespoons cold water.
- Chop the white chocolate finely and place in a large heatproof bowl.
- In a small saucepan, heat 150ml of the heavy cream until it just begins to simmer. Pour over the white chocolate and let stand for 30 seconds, then stir until smooth.
- In another small saucepan, whisk together the egg yolks, sugar, and 2 tablespoons of water. Cook over medium-low heat, whisking constantly, until the mixture reaches 160°F (71°C).
- Remove from heat and stir in the bloomed gelatin until fully dissolved.
- Pour this custard mixture through a fine-mesh sieve into the white chocolate mixture and stir until well combined. Let cool to room temperature.
- In a separate bowl, whip the remaining 250ml heavy cream to soft peaks.
- When the white chocolate mixture has cooled but is still fluid, gently fold in the whipped cream in three additions.
- Pour this mousse over the set milk chocolate layer and smooth the top. Refrigerate for at least 4 hours, preferably overnight.
Phase 4: The Chocolate Ganache Glaze
- When the cake is fully set, prepare the ganache glaze. Chop the dark chocolate finely and place in a heatproof bowl.
- Heat the heavy cream and glucose syrup in a small saucepan until it just begins to simmer.
- Pour over the chopped chocolate and let stand for 30 seconds, then stir until smooth.
- Add the butter and stir until incorporated and shiny.
- Let the ganache cool slightly (but still pourable) before using.
- Remove the cake from the refrigerator and carefully release it from the springform pan.
- Place the cake on a wire rack set over a baking sheet to catch drips.
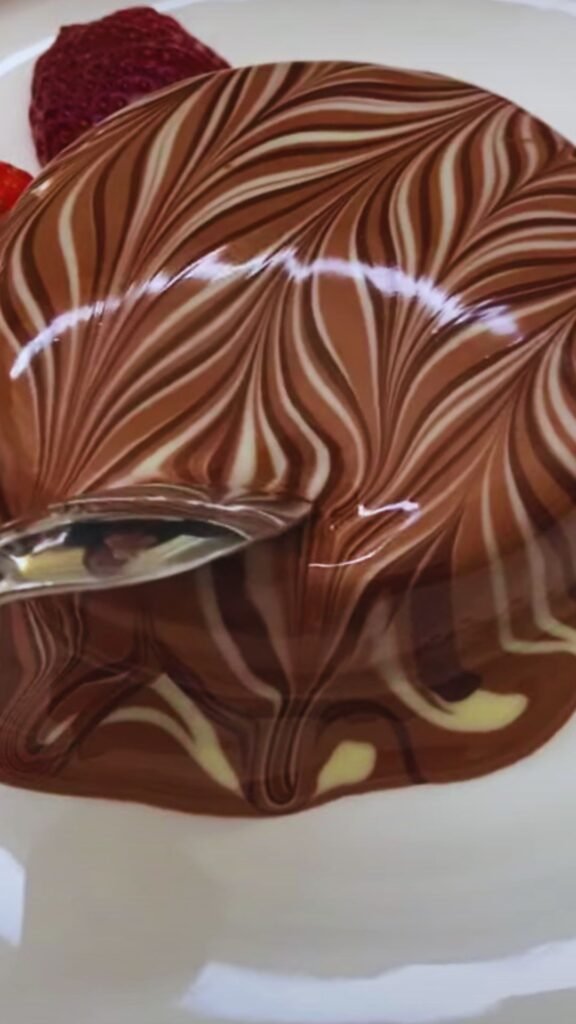
- Pour the ganache over the top of the cake, using an offset spatula to guide it just to the edges so it drips down attractively. You can cover just the top or let it drip down the sides for a more dramatic effect.
- Return the glazed cake to the refrigerator for at least 30 minutes to set the ganache.
Decorating Your Masterpiece
A cake this spectacular deserves a beautiful finish. Here are some elegant decoration ideas:
- Chocolate curls or shavings (dark, milk, and white for a triple effect)
- Cocoa powder dusted through a fine sieve around the edges
- Fresh raspberries or strawberries
- Edible gold leaf for a touch of luxury
- Chocolate-covered coffee beans
- A light dusting of powdered sugar on the plate (not on the ganache)
- Piped rosettes of whipped cream around the edges
For the chocolate curls, use a vegetable peeler against the flat side of a chocolate bar that’s been slightly warmed (but not melting). The warmth helps create beautiful, delicate curls instead of broken shavings.
The Science Behind Perfect Mousse
What makes this mousse cake work is the careful balance of ingredients and techniques:
| Element | Purpose | Common Pitfalls | My Solution |
|---|---|---|---|
| Gelatin | Stabilizes the mousse structure | Too much makes it rubbery; too little makes it collapse | Precise measurement (7g per layer) and proper blooming |
| Egg yolks | Creates rich custard base | Raw eggs pose safety concerns | Cooking to precise 160°F ensures safety while maintaining smoothness |
| Tempering chocolate | Ensures smooth texture | Overheating causes graininess | Using indirect heat and proper cooling techniques |
| Whipped cream folding | Creates airy texture | Overmixing deflates the mousse | Folding in three batches preserves air bubbles |
| Layer setting times | Prevents layers from mixing | Rushing causes blending between layers | Patience! Allow proper cooling between layers |
| Ganache temperature | Affects finish appearance | Too hot melts mousse; too cold doesn’t spread | Cool until slightly warm but still flowing |
Understanding these principles helps you troubleshoot if something isn’t turning out as expected. The most common issue is mousse that doesn’t set properly, usually caused by undermixed gelatin or impatience with cooling times.
Serving Suggestions
For the ultimate chocolate experience, serve this cake slightly chilled but not straight from the refrigerator. About 20-30 minutes at room temperature allows the mousse to soften just enough to reach peak creaminess.
Consider these accompaniments:
- A small scoop of vanilla bean ice cream
- Fresh raspberries or strawberries
- A dusting of high-quality cocoa powder
- A drizzle of warm salted caramel sauce
- Fresh mint leaves for color contrast
- A demitasse of espresso
- A small glass of amaretto or coffee liqueur
- Sweetened whipped cream with a hint of vanilla
The perfect slice size is smaller than you might think. This is an intensely rich dessert, so a modest wedge (about 1-2 inches at the wide end) is plenty for most people.
Variations to Explore
Once you’ve mastered the classic version, consider these creative variations:
- Orange-Infused Dark Layer: Add the zest of one orange to the dark chocolate base for a chocolate-orange flavor profile.
- Coffee-Enhanced Milk Chocolate: Add 1 tablespoon of espresso powder to the milk chocolate mousse for a mocha experience.
- Hazelnut White Chocolate: Fold 2 tablespoons of hazelnut praline paste into the white chocolate mousse.
- Peppermint Holiday Version: Add a few drops of peppermint extract to the white chocolate layer and garnish with crushed candy canes.
- Raspberry Accent: Add a thin layer of raspberry coulis between the dark base and milk chocolate mousse.
- Salted Caramel Surprise: Pour a layer of salted caramel sauce over the dark chocolate base before adding the milk chocolate mousse.
- Spiced Chocolate: Add a pinch of cayenne pepper and cinnamon to the dark chocolate base for a Mexican chocolate inspired twist.
Storage and Make-Ahead Tips
This dessert is perfect for entertaining because most of the work can be done well in advance:
- The entire cake can be made up to 3 days ahead and stored in the refrigerator (without decorations).
- For the freshest appearance, apply the ganache glaze and decorations the day you plan to serve.
- Cover carefully with plastic wrap that doesn’t touch the surface if storing for more than a day.
- Do not freeze this dessert; the mousse texture will suffer.
- Leftover cake will keep for up to 5 days in the refrigerator, though the texture is best within the first 3 days.
Common Questions Answered
Q: Can I make this without gelatin for a vegetarian version?
Yes! You can substitute agar-agar powder, using about 1 teaspoon per layer where the recipe calls for gelatin. Agar needs to be boiled to activate, so add it to the cream while heating rather than blooming it in cold water.
Q: What if I don’t have a springform pan?
A regular cake pan can work if lined with parchment that extends up the sides as “handles” to lift the cake out. Even better is using acetate cake collar inside the pan to create perfectly smooth sides.
Q: How do I prevent bubbles in my mousse layers?
Tap the pan gently on the counter several times after pouring each mousse layer. Any remaining tiny bubbles can be popped with a toothpick before the mousse sets.
Q: My ganache seems too thick to pour smoothly. What went wrong?
Ganache thickens as it cools. If it’s too thick, warm it gently by placing the bowl over warm (not hot) water and stirring until it reaches pouring consistency.
Q: Can I use chocolate chips instead of chocolate bars?
I don’t recommend it. Most chocolate chips contain stabilizers to help them keep their shape when baked, which can affect the smoothness of your mousse. Use high-quality chocolate bars for the best results.
Q: My mousse layers aren’t completely even. How do I fix this?
Use an offset spatula dipped in hot water and dried to smooth each layer. The warmth of the metal helps create a perfectly smooth surface.
Q: How do I achieve clean slices when serving?
Dip a sharp knife in hot water and wipe dry between each cut. This melts through the layers cleanly without dragging.
Why This Recipe Works
I’ve refined this recipe through dozens of iterations, and here’s why it produces consistent, spectacular results:
- The dark chocolate base is purposely under-baked slightly to maintain fudginess
- The mousse layers use a cooked custard base for food safety and stability
- Each chocolate type (dark, milk, white) is carefully chosen for its specific role in the flavor progression
- The ratio of chocolate to cream is precisely calibrated for each layer
- The setting time between layers prevents bleeding or mixing
- The ganache adds a professional finish while enhancing the chocolate flavor profile
The end result is a dessert that looks like it came from a high-end patisserie but can be created in your own kitchen with some patience and attention to detail.
Final Thoughts
Creating this Triple Chocolate Mousse Cake isn’t just about following steps—it’s about embracing the process of creating something extraordinary. There’s something deeply satisfying about seeing the distinct layers come together, each one building on the foundation of the last.
When you finally cut that first slice and reveal the beautiful stratification of chocolate, you’ll understand why this dessert has become my signature creation. It’s a labor of love, certainly, but one that rewards you with a truly spectacular result.
The combination of textures—from the dense fudgy base to the silky middle and the cloud-like top—creates an experience that’s greater than the sum of its parts. It’s this harmony of elements that makes chocolate lovers close their eyes in appreciation with that very first bite.
So set aside an afternoon, gather your finest ingredients, and prepare to create a chocolate masterpiece that will cement your reputation as a dessert virtuoso. Your friends and family will be talking about this creation long after the last crumb has disappeared.