I’ve been perfecting my honey chicken recipe for over a decade, and I’m thrilled to share the secret that changed everything: how to keep that golden, crispy coating intact for hours! After countless kitchen experiments and more than a few disappointing soggy attempts, I finally cracked the code to achieving restaurant-quality honey chicken that maintains its satisfying crunch long after it leaves the fryer.
The frustration of watching beautifully crispy chicken turn limp and soggy within minutes used to drive me absolutely crazy. I’d spend hours preparing the perfect coating, only to watch it deteriorate before my guests even sat down to eat. That’s when I embarked on a mission to solve this culinary puzzle once and for all.
Understanding the Science Behind Crispy Coatings
Before diving into my foolproof method, let me explain what makes chicken stay crispy – or lose its crunch. The enemy of crispy chicken is moisture, both from steam trapped inside the coating and humidity from the environment. Traditional honey chicken recipes often fail because:
Moisture Migration : Steam from the hot chicken meat moves outward through the coating, creating soggy spots that quickly spread
Sugar Crystallization : Honey contains natural sugars that can create a sticky surface, trapping moisture against the coating
Coating Composition : Many recipes use simple flour coatings that absorb moisture readily, breaking down the crispy barrier
Temperature Fluctuation : Rapid cooling causes condensation to form on the chicken’s surface, immediately compromising the coating
My breakthrough came when I realized that creating the perfect crispy honey chicken isn’t just about the initial frying technique – it’s about engineering a coating system that actively resists moisture penetration.
The Secret Weapon: My Triple-Barrier Coating System
After experimenting with dozens of different approaches, I developed what I call the “Triple-Barrier System.” This method creates three distinct layers that work together to lock out moisture while maintaining that irresistible honey flavor.
Primary Barrier (Cornstarch Base) : Creates an ultra-thin, moisture-resistant foundation that bonds directly to the chicken
Secondary Barrier (Modified Flour Blend) : Provides structure and additional moisture protection while creating the perfect texture
Tertiary Barrier (Specialized Honey Glaze) : Seals everything together while delivering that signature sweet flavor without compromising crispiness
Essential Ingredients for Maximum Crispiness
Let me break down the exact ingredients you’ll need, along with why each one is crucial for achieving that long-lasting crunch:
| Ingredient | Quantity | Purpose | Substitution Options |
|---|---|---|---|
| Chicken thighs (boneless) | 2 lbs | Ideal fat content for moisture | Chicken breasts (adjust cooking time) |
| Cornstarch | 1/2 cup | Primary moisture barrier | Potato starch (1:1 ratio) |
| All-purpose flour | 1 cup | Structure and texture | Rice flour for gluten-free |
| Baking powder | 2 tsp | Creates air pockets for crispiness | Cannot substitute |
| Garlic powder | 1 tsp | Flavor enhancement | Fresh garlic (minced) |
| Onion powder | 1 tsp | Depth of flavor | Fresh onion powder |
| Paprika | 1 tsp | Color and mild flavor | Smoked paprika for depth |
| Salt | 2 tsp | Flavor and moisture extraction | Sea salt or kosher salt |
| White pepper | 1/2 tsp | Heat without dark specks | Black pepper (visual difference) |
| Eggs | 3 large | Binding agent | Buttermilk for tangier flavor |
| Cold sparkling water | 1/4 cup | Creates lighter coating | Regular cold water |
| Honey | 1/3 cup | Primary sweetener | Maple syrup (different flavor profile) |
| Rice vinegar | 2 tbsp | Balances sweetness | Apple cider vinegar |
| Soy sauce | 2 tbsp | Umami depth | Tamari for gluten-free |
| Fresh ginger | 1 tbsp (grated) | Aromatic complexity | Ground ginger (1 tsp) |
| Sesame oil | 1 tsp | Nutty finish | Olive oil (different flavor) |
| Vegetable oil | 6 cups | Frying medium | Peanut or canola oil |
Step-by-Step Preparation Method
Phase 1: Chicken Preparation
I start by cutting my chicken thighs into uniform pieces, roughly 2-inch chunks. Uniform sizing ensures even cooking and consistent crispiness across every piece. I pat each piece completely dry with paper towels – this step is absolutely critical and cannot be skipped.
Next, I season the chicken pieces with salt and let them sit for 30 minutes. This process, called dry brining, draws out surface moisture while seasoning the meat throughout. The salt creates a slightly dehydrated surface that accepts coatings more readily.
Phase 2: Creating the Triple-Barrier Coating
Station 1: Cornstarch Dredge I combine the cornstarch with half the garlic powder, onion powder, and a pinch of salt. This creates my primary moisture barrier. Each piece of chicken gets thoroughly coated in this mixture, with excess shaken off.
Station 2: Egg Wash Enhancement My egg wash isn’t ordinary – I whisk the eggs with cold sparkling water, which creates tiny air bubbles that contribute to the coating’s lightness. The carbonation also helps the coating puff up during frying.
Station 3: The Magic Flour Blend This is where the real magic happens. I combine the flour with baking powder, remaining spices, and a secret ingredient: a tablespoon of cornstarch mixed directly into the flour. This creates pockets of extra crispiness throughout the coating.
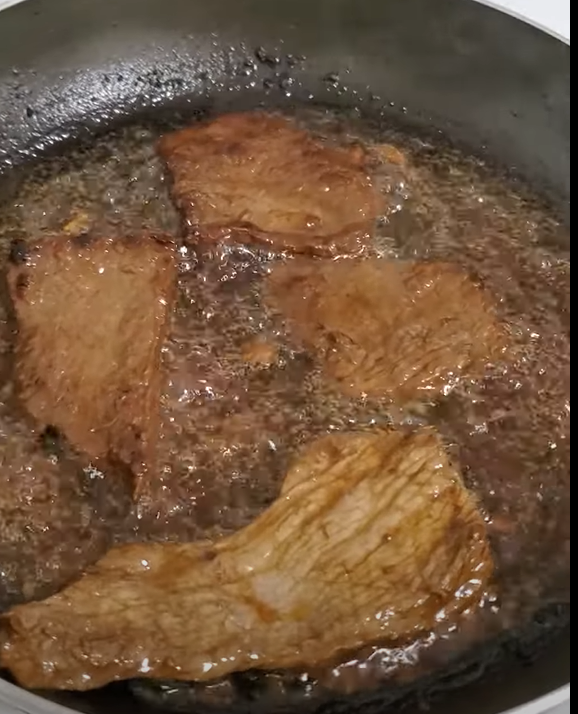
Phase 3: The Frying Process
Temperature control is everything when it comes to crispy chicken that stays crispy. I heat my oil to exactly 325°F – not the typical 350°F most recipes call for. This lower temperature allows the coating to set properly without browning too quickly, creating a more durable crispy shell.
I fry in small batches, never overcrowding the pot. Each batch takes about 6-7 minutes, and I watch for that perfect golden color rather than relying solely on time. The coating should sound crispy when tapped with a fork.
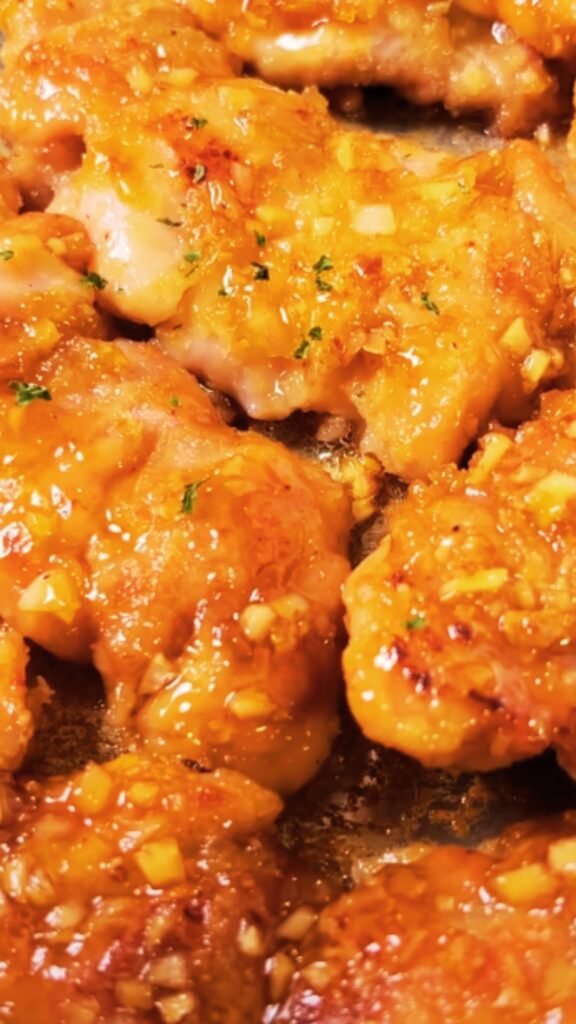
The Game-Changing Honey Glaze
Here’s where most recipes go wrong: they apply the honey glaze while the chicken is still hot and steaming. My method involves a two-stage glazing process that preserves crispiness.
Stage 1: The Searing Glaze I combine honey, rice vinegar, soy sauce, grated ginger, and sesame oil in a small saucepan. I heat this mixture until it just begins to bubble, then immediately remove it from heat. The brief heating activates the flavors without creating a sticky mess.
Stage 2: The Strategic Application Instead of tossing the hot chicken directly in the glaze, I let the chicken cool for exactly 3 minutes after frying. This brief cooling period allows the coating to set while the chicken remains hot enough to accept the glaze properly.
I then lightly brush – not douse – each piece with the glaze using a pastry brush. This controlled application ensures flavor without compromising the coating’s integrity.
Nutritional Information and Serving Data
| Nutritional Component | Per Serving (4 oz) | Daily Value % |
|---|---|---|
| Calories | 385 | 19% |
| Total Fat | 18g | 23% |
| Saturated Fat | 4g | 20% |
| Cholesterol | 95mg | 32% |
| Sodium | 680mg | 30% |
| Total Carbohydrates | 28g | 10% |
| Dietary Fiber | 1g | 4% |
| Sugars | 12g | – |
| Protein | 32g | 64% |
| Vitamin A | 8% DV | – |
| Calcium | 4% DV | – |
| Iron | 12% DV | – |
Advanced Tips for Extended Crispiness
The Resting Technique After glazing, I place the chicken on a wire rack set over a baking sheet. This elevation allows air to circulate completely around each piece, preventing steam buildup that would soften the bottom coating.
The Oven Holding Method For parties or meal prep, I keep finished honey chicken crispy by placing it in a 200°F oven on wire racks. This gentle heat maintains crispiness for up to 4 hours without overcooking the meat.
The Reheating Strategy Leftover honey chicken can be revived to nearly original crispiness by placing it on a wire rack in a 400°F oven for 5-6 minutes. Never use the microwave, which will immediately destroy all your hard work.
Troubleshooting Common Crispiness Problems
Problem: Coating Falls Off During Frying Solution: Ensure each piece is completely dry before coating, and allow coated pieces to rest for 10 minutes before frying.
Problem: Coating Gets Soggy Within Minutes Solution: Oil temperature was likely too low, creating greasy absorption rather than crispy sealing.
Problem: Honey Glaze Makes Everything Sticky Solution: Apply glaze more sparingly and ensure chicken has cooled slightly before glazing.
Problem: Uneven Browning Solution: Maintain consistent oil temperature and avoid overcrowding the fryer.
Creative Variations and Flavor Profiles
Spicy Honey Variation
I add 1-2 teaspoons of sriracha to my honey glaze for those who enjoy heat with their sweet. The capsaicin actually helps preserve crispiness by creating a slight barrier effect.
Asian-Inspired Twist
Substituting rice vinegar with black vinegar and adding a teaspoon of five-spice powder to the coating creates an entirely different flavor profile while maintaining the same crispiness principles.
Herb-Crusted Version
Fresh thyme and rosemary mixed into the flour coating, combined with a honey-herb glaze, offers a more sophisticated flavor suitable for dinner parties.
Storage and Meal Prep Guidelines
| Storage Method | Duration | Quality Retention | Reheating Instructions |
|---|---|---|---|
| Room Temperature | 2 hours | Excellent | Serve immediately |
| Refrigerated | 3 days | Good | Oven reheat 400°F, 5-6 minutes |
| Frozen (unglazed) | 3 months | Excellent | Thaw, then glaze and serve |
| Frozen (glazed) | 1 month | Good | Oven reheat 375°F, 8-10 minutes |
For meal prep enthusiasts, I recommend frying the chicken and storing it unglazed. Apply the honey glaze just before serving for optimal crispiness and flavor.
Serving Suggestions and Pairings
My crispy honey chicken pairs beautifully with steamed jasmine rice, which absorbs any excess glaze while providing a neutral backdrop for the bold flavors. I also love serving it alongside:
- Asian Cucumber Salad: The cool, crisp texture contrasts perfectly with the warm, crispy chicken
- Garlic Fried Rice: The savory rice complements the sweet honey notes
- Steamed Broccoli: Simple preparation lets the chicken remain the star
- Asian Slaw: Provides textural contrast and helps cut through the richness
For casual gatherings, I serve this honey chicken as an appetizer with toothpicks, allowing guests to enjoy the crispiness without utensils that might scrape off the coating.
Professional Chef Secrets
After working in restaurant kitchens early in my career, I learned several professional tricks that home cooks rarely know:
The Double-Fry Method: For ultimate crispiness, some chefs fry the chicken twice – once at 325°F for cooking through, then again at 375°F for final crisping. I find this unnecessary with my coating method, but it’s an option for perfectionists.
The Starch Blend Secret: Professional kitchens often blend different starches for optimal texture. My home adaptation uses cornstarch and flour, but potato starch or tapioca starch can create even more complex textures.
The Glaze Temperature Rule: Restaurant glazes are always applied at specific temperatures to prevent coating compromise. My 3-minute cooling rule mimics this professional timing.
Questions and Answers
Q: Can I make this honey chicken ahead of time for a party? A: Absolutely! I recommend frying the chicken up to 4 hours in advance and keeping it warm in a 200°F oven on wire racks. Apply the honey glaze just 30 minutes before serving for optimal crispiness and flavor.
Q: What’s the best oil for frying this honey chicken? A: I prefer vegetable or canola oil for their neutral flavor and high smoke point. Peanut oil is excellent if you’re not concerned about allergies, as it adds a subtle nutty flavor that complements the honey.
Q: My coating always seems to fall off during frying. What am I doing wrong? A: This usually happens when the chicken isn’t dry enough before coating, or when the oil temperature is incorrect. Make sure to pat the chicken completely dry, let the coated pieces rest for 10 minutes before frying, and maintain oil temperature at 325°F.
Q: Can I bake this honey chicken instead of frying it? A: While baking won’t achieve the same level of crispiness, you can bake at 425°F on wire racks for about 25-30 minutes. Spray the coating lightly with cooking oil before baking, and apply the glaze during the last 5 minutes of cooking.
Q: How do I prevent the honey glaze from making the coating soggy? A: The key is timing and application method. Let the chicken cool for 3 minutes after frying, then brush the glaze on lightly rather than tossing the chicken in it. Using a pastry brush gives you much better control.
Q: Can I use chicken breasts instead of thighs? A: Yes, but you’ll need to adjust the cooking time since breasts cook faster and can dry out more easily. Cut them into slightly larger pieces and reduce frying time to 5-6 minutes. Thighs stay more moist and forgiving, which is why I prefer them.
Q: What’s the secret to keeping the coating crispy for hours? A: It’s all about moisture management. Use my triple-barrier coating system, maintain proper oil temperature, allow proper cooling time before glazing, and keep finished chicken elevated on wire racks so air can circulate underneath.
Q: Can I make this recipe gluten-free? A: Absolutely! Replace the all-purpose flour with rice flour or a gluten-free flour blend, and use tamari instead of soy sauce. The cornstarch base already makes this recipe naturally lower in gluten than traditional fried chicken.
This honey chicken recipe has transformed my approach to fried chicken entirely. The combination of proper technique, quality ingredients, and understanding the science behind crispiness creates results that rival any restaurant. I’m confident that once you try this method, you’ll never go back to soggy honey chicken again. The satisfaction of biting into that perfect crispy coating hours after cooking is absolutely worth every step of this process.