Have you ever bitten into a perfect macaron? That delicate crunch giving way to a chewy interior, followed by a burst of silky filling? I still remember my first experience with these delicate French confections – and the countless failed attempts that followed when I tried to recreate them in my kitchen.
After years of practice, countless batches (both triumphant and tragic), and deep dives into the science of macaronage, I’ve finally cracked the code to consistently perfect macarons. Today, I’m sharing everything I’ve learned so you can achieve macaron mastery without the heartbreak I experienced.
French macarons have a reputation for being temperamental and difficult to master. They’re not wrong! But with the right techniques, quality ingredients, and a dash of patience, anyone can create these elegant treats at home. What was once an intimidating challenge has become one of my favorite weekend baking projects.
Let’s transform you from a macaron novice to a confident baker who can whip up these coveted treats whenever the craving strikes. No more hollow shells, cracked tops, or feet-less wonders – just perfectly executed macarons that would make any French pâtissier proud.
The Science Behind Perfect Macarons
Before diving into the recipe, understanding the science behind macarons will help you troubleshoot issues and adapt to your kitchen environment. This isn’t just about following steps—it’s about mastering a delicate chemical process.
Macarons rely on four critical components:
- Proper meringue formation: Creating the perfect network of air bubbles suspended in egg white proteins
- Correct macaronage technique: The folding method that deflates the meringue just enough
- Precise ingredient ratios: The balance between almond flour, sugar, and egg whites
- Controlled baking environment: Temperature and humidity play crucial roles
The magic of macarons lies in their structure. When baked, the air trapped in the meringue expands, creating that signature “foot” at the base. Meanwhile, the exterior forms a delicate shell while maintaining a slightly chewy interior.
Let’s break down each component:
Meringue Formation
The meringue is the foundation of your macarons. When you whip egg whites, you’re essentially creating a protein network that traps air bubbles. The addition of sugar stabilizes this network. Undermixed meringue won’t hold its shape, while overmixed meringue becomes dry and grainy.
Macaronage Technique
This French term describes the folding process where you incorporate the dry ingredients into the meringue. Too little folding means your batter won’t spread properly; too much and you’ll end up with flat, footless macarons. The goal is a smooth, flowing batter with ribbon-like consistency.
Environmental Factors
Humidity is the arch-nemesis of macarons. High humidity can prevent shells from drying properly before baking, leading to cracked surfaces and no feet. Temperature also affects how quickly the shells form and how evenly they bake.
With these principles in mind, let’s move on to the star of the show—the recipe itself.
Essential Equipment
Before we begin, gather these tools to ensure your macaron-making process goes smoothly:
- Digital kitchen scale: Precision is non-negotiable; volume measurements simply won’t cut it
- Stand mixer or electric hand mixer: For achieving that perfect meringue
- Fine mesh sieve: For sifting dry ingredients
- Silicone spatula: For the all-important macaronage technique
- Piping bags: With round tips (I recommend Wilton #12)
- Baking sheets: Heavy-duty ones that won’t warp
- Silicone baking mats or parchment paper: Silicone mats provide more consistent results
- Oven thermometer: Most home ovens are inaccurate; knowing your true temperature is crucial
- Template: For consistent macaron sizes (printable options available online)
Ingredient Breakdown
Quality ingredients make a significant difference in macarons. Here’s what you’ll need and why each component matters:
| Ingredient | Weight | Purpose | Notes |
|---|---|---|---|
| Almond flour | 120g | Forms the base structure | Must be finely ground and sifted |
| Powdered sugar | 170g | Provides structure and sweetness | Contains cornstarch that helps stabilize |
| Granulated sugar | 100g | Stabilizes the meringue | Add gradually for best results |
| Egg whites | 100g (about 3 large) | Creates the meringue structure | Aged whites work better (24-48 hours) |
| Cream of tartar | 1/4 tsp | Stabilizes egg whites | Optional but recommended |
| Salt | Pinch | Enhances flavor | Just a tiny amount |
| Gel food coloring | As needed | For desired color | Avoid liquid colors that add moisture |
| Vanilla extract or flavoring | 1/2 tsp | Flavor enhancement | Use high-quality extract |
The Foolproof French Macaron Recipe
Preparation (The Day Before)
- Age your egg whites: Separate eggs and place whites in a clean container, covered with plastic wrap with a few holes poked in it. Store in the refrigerator for 24-48 hours.
- Bring to room temperature: Remove aged egg whites from the refrigerator at least 2 hours before beginning.
- Prepare templates: Either purchase macaron templates or print them (1.5-inch circles work well for standard macarons).
- Check humidity: Ideal conditions are below 60% humidity. If your kitchen is humid, consider running a dehumidifier.
Step 1: Prepare Your Workspace
- Preheat your oven to 300°F (150°C). Place an oven thermometer inside to verify accuracy.
- Line baking sheets with silicone mats or parchment paper (place templates underneath if using parchment).
- Prepare piping bags with round tips.
- Measure all ingredients using your digital scale.
Step 2: Process Dry Ingredients
- Combine almond flour and powdered sugar in a food processor and pulse 8-10 times to further refine the texture.
- Sift the mixture through a fine-mesh sieve into a large bowl. Discard any large pieces that don’t pass through (should be less than 2 teaspoons).
- Repeat the sifting process once more for ultra-smooth shells.
Step 3: Make the Meringue
- In a clean, dry mixing bowl (any trace of fat will prevent proper meringue formation), add room temperature egg whites.
- Begin mixing on medium-low speed until frothy.
- Add cream of tartar and a pinch of salt.
- Increase speed to medium and gradually add granulated sugar, about one tablespoon at a time.
- Once all sugar is incorporated, increase to medium-high speed.
- Continue beating until stiff peaks form. The meringue should:
- Hold a firm peak when you lift the whisk
- Look glossy and smooth
- Not slide when you tilt the bowl
- Take approximately 8-10 minutes total
Step 4: Add Color and Flavor
- Add gel food coloring and vanilla extract (or other flavoring).
- Beat for an additional 30 seconds to incorporate.
Pro tip: For vibrant colors, remember that the shade will lighten after baking. Go slightly darker than your target color.
Step 5: Master the Macaronage Technique
This is where many macaron attempts fail. Follow these steps carefully:
- Add one-third of the sifted dry ingredients to the meringue.
- Using a silicone spatula, fold gently by scraping around the bowl’s edge and cutting through the middle.
- Add the remaining dry ingredients in two more additions, folding after each.
- Continue folding until the batter reaches the proper consistency—like slow-moving lava.
The ribbon test: Lift some batter with your spatula and let it flow back into the bowl. If it forms a ribbon that disappears back into the rest of the batter within about 30 seconds, it’s ready. If it stays on top without incorporating, continue folding.
Figure-8 test: You should be able to draw a figure 8 with the batter without it breaking.

Step 6: Pipe the Macarons
- Transfer the batter to your piping bag.
- Hold the bag perpendicular to the baking sheet, about 1/2 inch above it.
- Pipe 1.5-inch circles, applying even pressure and stopping just before reaching the template’s edge (the batter will spread slightly).
- Once all circles are piped, firmly tap the baking sheet against the counter 3-4 times to release air bubbles.
- Use a toothpick to pop any visible surface bubbles.
Step 7: Rest the Shells
- Allow the piped macarons to rest until a skin forms on the surface. When touched gently with your finger, no batter should stick.
- This typically takes 30-60 minutes depending on humidity levels.
- This resting period is crucial—it allows the outer surface to dry, which helps create the signature “feet.”
Step 8: Bake with Precision
- Bake at 300°F (150°C) for 14-16 minutes. Every oven is different, so watch carefully.
- The macarons are done when they:
- Form feet around the bottom
- Don’t wobble when gently touched
- Lift cleanly off the mat/parchment when cooled
- Allow to cool completely on the baking sheet before removing.
Step 9: Fill and Mature
- Match shells of similar sizes to create pairs.
- Pipe filling (recipes below) onto the flat side of one shell.
- Sandwich with another shell, pressing gently until filling reaches the edges.
- Store filled macarons in an airtight container in the refrigerator for 24 hours before serving. This “maturation” process allows flavors to meld and the shells to soften slightly for that perfect texture.
Magnificent Macaron Fillings
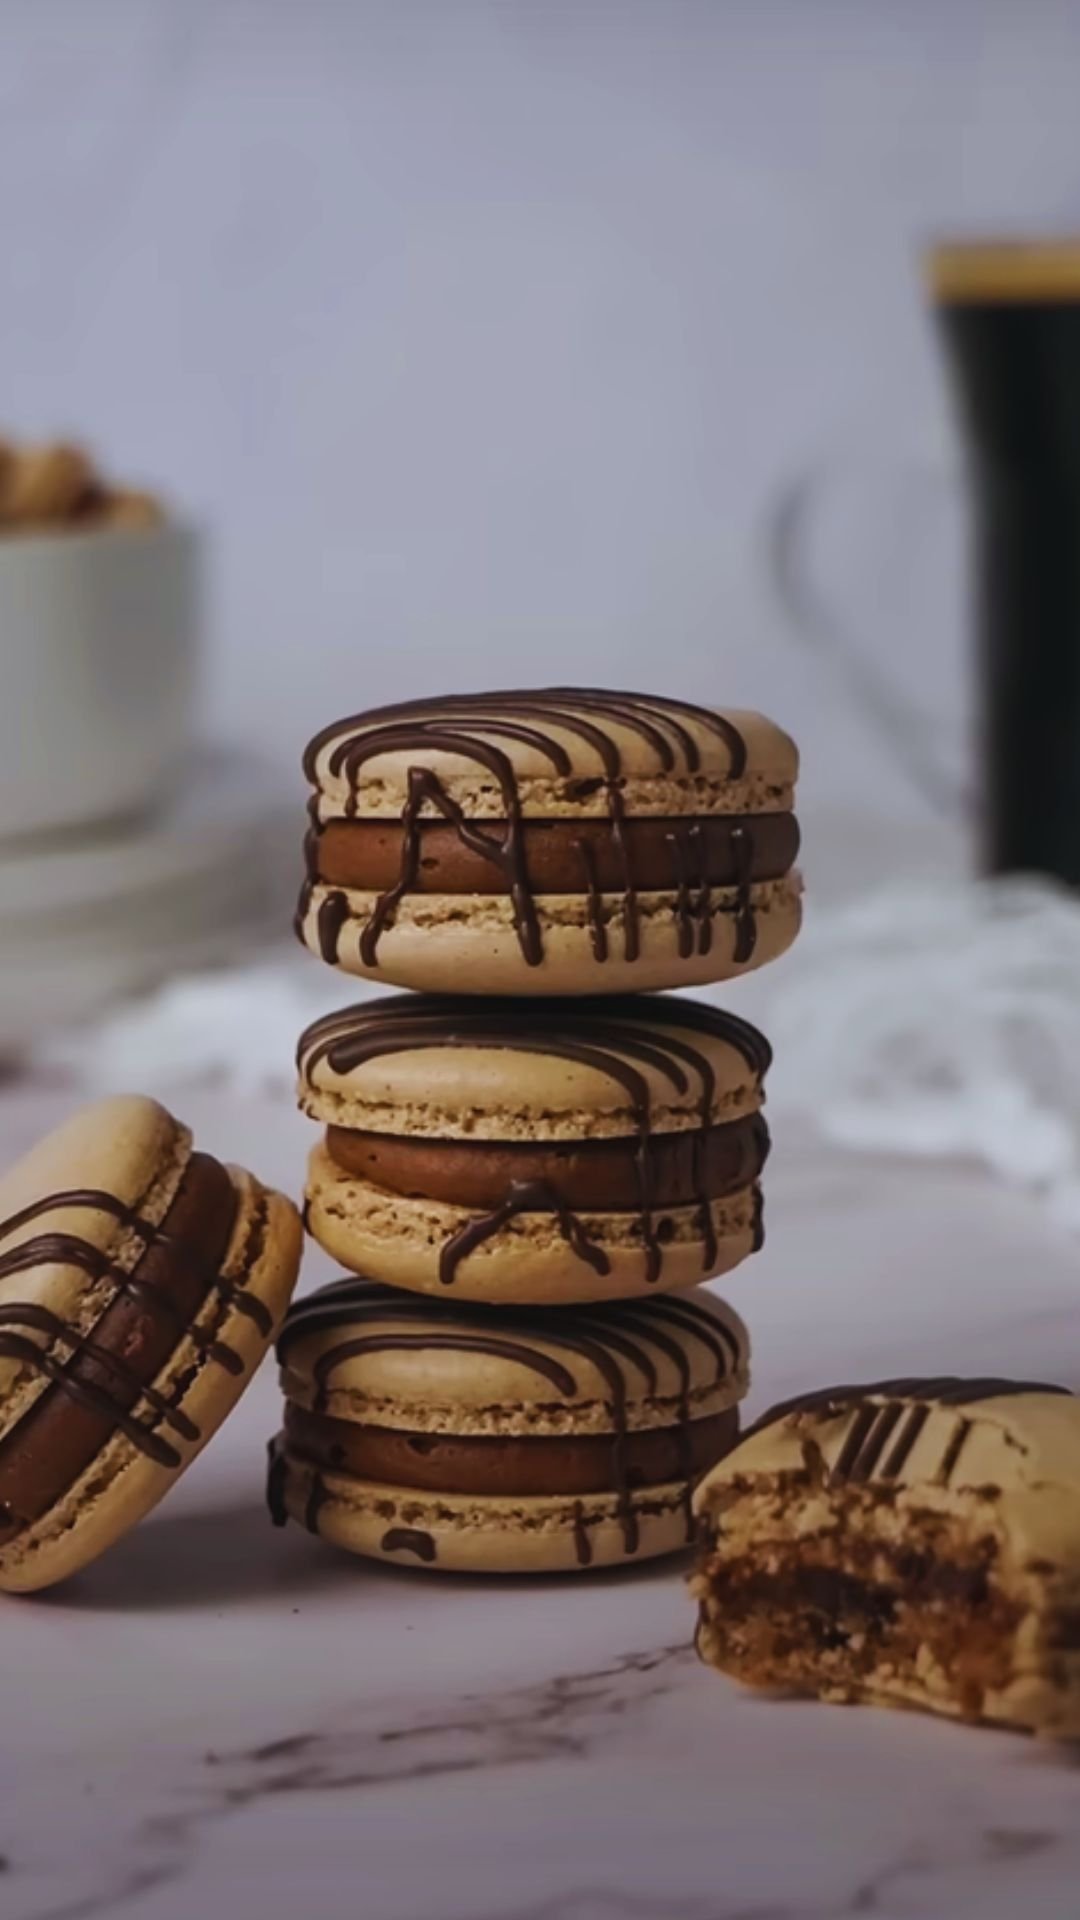
While the shells are important, fillings are where you can get creative with flavors. Here are three classic fillings to get you started:
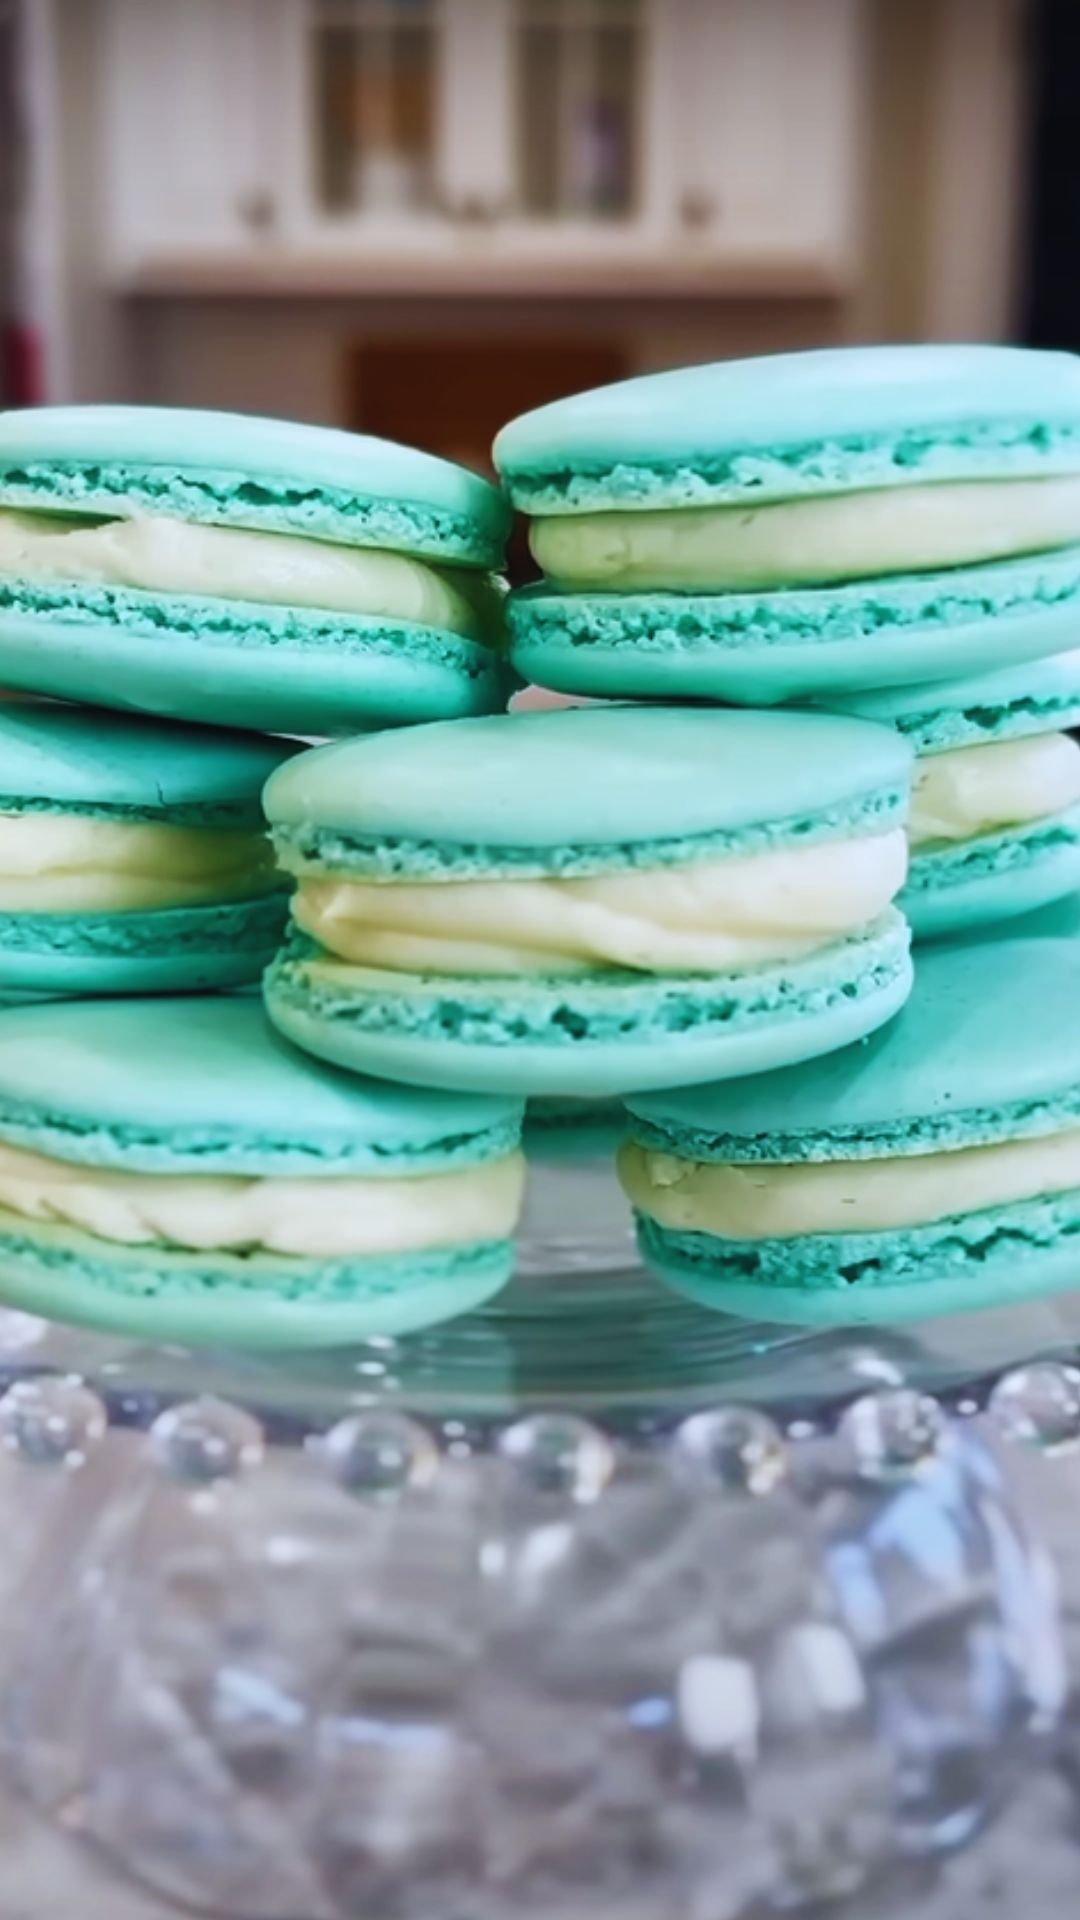
Classic Vanilla Buttercream
| Ingredient | Amount | Notes |
|---|---|---|
| Unsalted butter | 115g (1/2 cup) | Room temperature |
| Powdered sugar | 240g (2 cups) | Sifted |
| Vanilla bean paste | 1 tsp | Or 2 tsp extract |
| Heavy cream | 1-2 tbsp | For consistency |
| Salt | Pinch | Balances sweetness |
Instructions:
- Beat butter until creamy, about 2 minutes.
- Gradually add sifted powdered sugar, mixing on low speed.
- Add vanilla bean paste and salt.
- Add heavy cream as needed to achieve a smooth, pipeable consistency.
- Beat on medium-high for 2-3 minutes until light and fluffy.
Rich Chocolate Ganache
| Ingredient | Amount | Notes |
|---|---|---|
| Dark chocolate | 120g (4 oz) | Finely chopped, 60-70% cocoa |
| Heavy cream | 120ml (1/2 cup) | |
| Unsalted butter | 15g (1 tbsp) | Optional, for shine and stability |
| Vanilla extract | 1/2 tsp |
Instructions:
- Heat cream until just simmering (do not boil).
- Pour over chopped chocolate and let sit for 30 seconds.
- Stir gently until smooth and glossy.
- Stir in butter and vanilla if using.
- Allow to cool and thicken at room temperature, stirring occasionally (about 30-60 minutes).
Zesty Lemon Curd
| Ingredient | Amount | Notes |
|---|---|---|
| Fresh lemon juice | 60ml (1/4 cup) | From about 2 lemons |
| Lemon zest | 1 tbsp | Finely grated |
| Granulated sugar | 100g (1/2 cup) | |
| Eggs | 2 large | |
| Egg yolk | 1 large | For richness |
| Unsalted butter | 57g (4 tbsp) | Cold, cubed |
Instructions:
- Whisk together juice, zest, sugar, eggs, and yolk in a heatproof bowl.
- Place over a pot of simmering water (double boiler method).
- Stir constantly until mixture thickens enough to coat the back of a spoon (about 170°F/77°C).
- Remove from heat and stir in cold butter until melted.
- Strain through a fine-mesh sieve to remove zest and any cooked egg bits.
- Cover surface directly with plastic wrap and chill until firm, at least 2 hours.
Flavor Variations
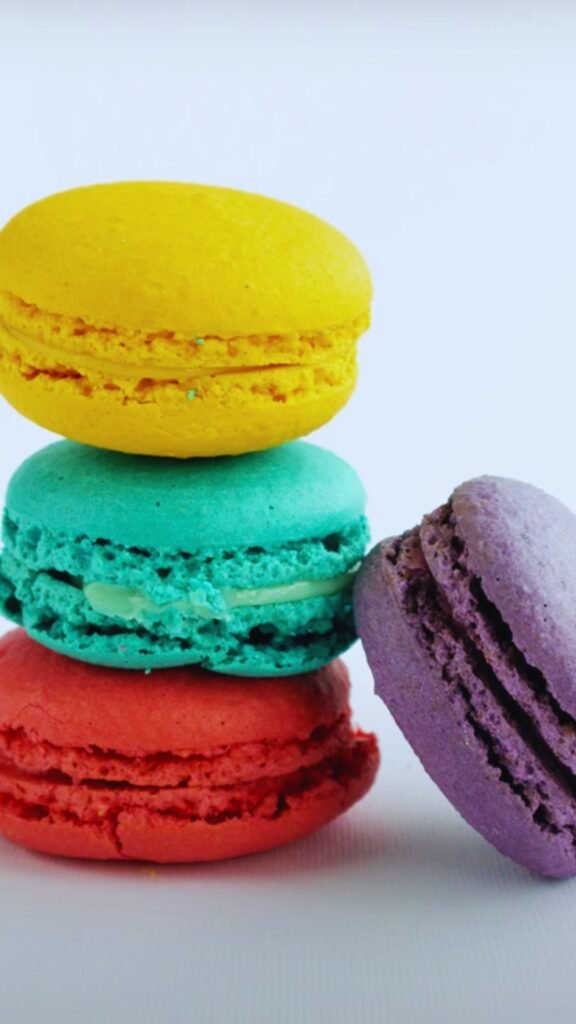
The beauty of macarons is their versatility. Here are some exciting flavor combinations to try once you’ve mastered the basic recipe:
- Salted Caramel: Vanilla shells + caramel buttercream with flaky sea salt
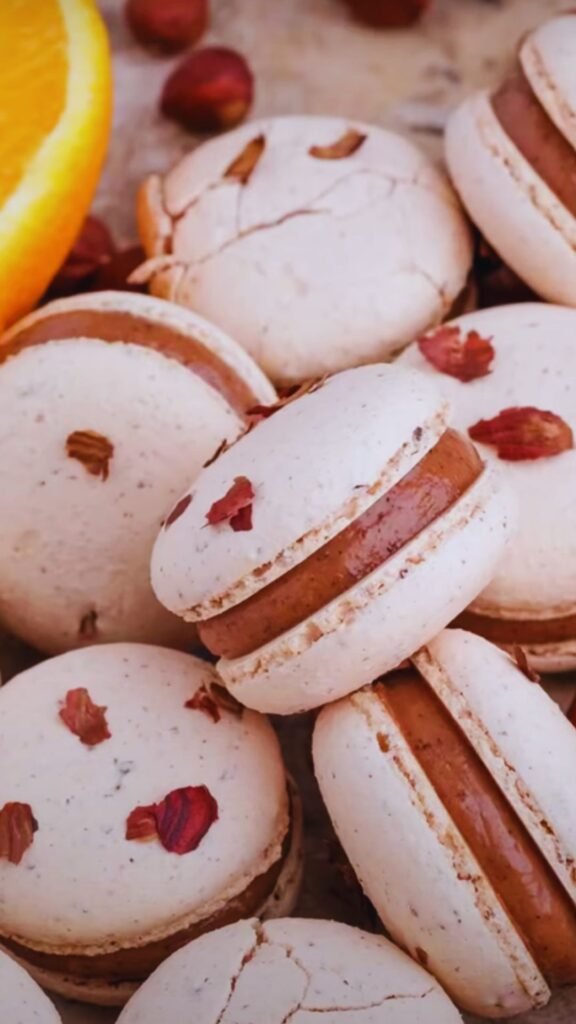
- Raspberry Rose: Pink shells flavored with rose water + raspberry jam mixed with buttercream
- Earl Grey: Shells with earl grey tea leaves ground with the almond flour + vanilla bean buttercream
- Pistachio: Light green shells + pistachio paste buttercream
- Coffee: Tan shells with espresso powder + chocolate ganache
- Lavender Honey: Lavender-tinted shells + honey buttercream
- Matcha: Green tea powder in shells + white chocolate ganache
Troubleshooting Common Macaron Problems
Even experienced bakers encounter issues with macarons. Here’s how to identify and fix the most common problems:
| Problem | Cause | Solution |
|---|---|---|
| Hollow shells | Too high oven temperature or undermixed batter | Lower oven temperature by 5-10°F; fold batter slightly more |
| Cracked tops | Undermixed meringue, too much air in the batter, or not rested enough | Beat meringue to proper stiffness; tap sheets firmly after piping; ensure shells form a skin before baking |
| No feet | Overmixed batter, insufficient resting time, or too low oven temperature | Fold less during macaronage; allow longer rest time; increase oven temperature slightly |
| Wrinkled tops | Too much moisture or fat in the batter | Use gel colors instead of liquid; ensure no yolk in egg whites; avoid humid days |
| Lopsided feet | Uneven heat distribution in oven | Rotate pans halfway through baking; use an oven thermometer; avoid opening the oven door |
| Sticky bottoms | Underbaked | Increase baking time by 1-2 minutes; let cool completely before removing |
| Browning | Oven too hot | Reduce oven temperature; place an empty baking sheet on the rack above to shield |
| Inconsistent sizes | Piping technique | Use templates; practice consistent pressure when piping |
Storage and Presentation
Properly stored macarons not only last longer but actually improve with time:
Storage Tips
- Unfilled shells: Store in an airtight container at room temperature for up to 5 days.
- Filled macarons: Refrigerate in an airtight container for 3-5 days. Bring to room temperature for 20-30 minutes before serving.
- Freezing: Place filled macarons in an airtight container with parchment between layers and freeze for up to 3 months. Thaw in the refrigerator overnight.
Presentation Ideas
- Stack macarons in a pyramid for an impressive dessert table centerpiece
- Package in clear gift boxes tied with ribbon for gifts
- Serve on a tiered stand for afternoon tea
- Create ombré effects by arranging similar colors in gradient order
- Place in decorative jars for a colorful display
Advanced Techniques
Once you’ve mastered basic macarons, try these advanced techniques:
Italian Meringue Method
This alternative method produces more stable results by using hot sugar syrup to cook the egg whites as you whip them:
- Make a sugar syrup with 100g granulated sugar and 40ml water, heating to 244°F (118°C).
- While the syrup heats, begin whipping egg whites until foamy.
- Pour hot syrup in a thin stream into whites while continuing to whip.
- Beat until glossy and stiff peaks form.
- Continue with the macaronage process as usual.
Decorative Techniques
- Painted shells: Use food coloring mixed with clear extract to paint designs on baked shells
- Drizzled shells: Drizzle melted chocolate over the tops after filling
- Sprinkled tops: Add sprinkles, edible glitter, or cocoa nibs before baking
- Marbled effect: Stripe the piping bag with gel color before adding batter
- Two-toned shells: Pipe a base color, then pipe dots or lines of another color before resting
Multi-Flavored Shells
Add ground freeze-dried fruits, cocoa powder, or tea leaves to portions of your batter for naturally flavored and colored shells. Replace about 5-10g of the almond flour with these flavoring agents.
Serving Suggestions
Macarons are versatile enough to shine in multiple settings:
- Afternoon tea: Pair with Earl Grey, Darjeeling, or chamomile tea
- Coffee pairing: Serve with espresso or cappuccino for a sophisticated coffee break
- Dessert platters: Combine with chocolate truffles, petit fours, and fresh berries
- Ice cream accompaniment: Use as “bookends” for small ice cream sandwiches
- Wedding or shower favors: Package individual macarons in decorative boxes
- Holiday gifts: Create seasonal flavors and colors for festive gifting
Questions & Answers
Why do my macarons have hollow shells?
Hollow shells typically occur when air bubbles expand during baking but the structure isn’t stable enough to maintain its shape as it cools. This can happen from undermixed batter (not enough macaronage), oven temperature being too high, or removing the macarons from the oven too quickly. Try slightly increasing your folding during macaronage, lowering your oven temperature by 5-10°F, and letting the macarons cool completely in the oven with the door cracked.
Do I really need to measure ingredients by weight?
Absolutely! Macarons require precision that volume measurements simply cannot provide. Even a few grams difference can affect the outcome. A digital kitchen scale is an essential tool for successful macarons.
How long should I let the macarons rest before baking?
This depends entirely on your kitchen environment. In dry conditions, 30 minutes may be sufficient. In humid environments, it could take up to 90 minutes. The key indicator is the skin formation—when you can gently touch the surface without batter sticking to your finger, they’re ready to bake.
Can I make macarons on a rainy day?
It’s best to avoid making macarons during extremely humid conditions. High humidity prevents the shells from drying properly before baking, which often results in cracked tops and no feet. If you must bake on a humid day, use air conditioning or a dehumidifier in your kitchen, and expect to extend the resting time significantly.
Why don’t my macarons have feet?
Feet development is affected by several factors. Most commonly, the lack of feet means either: 1) the shells didn’t develop a proper skin before baking (insufficient rest time), 2) the oven temperature was too low, or 3) the batter was overmixed. Ensure you’re allowing enough resting time, check your oven temperature with a thermometer, and be careful not to overfold during the macaronage stage.
How do I get vibrant colors without affecting the batter consistency?
Always use gel food coloring rather than liquid. Gel colors provide intense pigmentation without adding significant moisture to your batter. For extremely vibrant colors, consider using powder food coloring, which adds no moisture at all. Remember that macaron shells will lighten during baking, so make your batter slightly darker than your desired final color.
My macarons stick to the parchment paper. What am I doing wrong?
Sticky bottoms usually indicate underbaking. Try increasing your baking time by 1-2 minutes. Also, ensure you’re allowing the macarons to cool completely before attempting to remove them. If the problem persists, try using silicone baking mats instead of parchment paper.
Why do I need to “mature” macarons in the refrigerator?
The maturation process allows moisture from the filling to slightly soften the shells, creating that perfect texture contrast between the crisp exterior and chewy interior. This resting period also allows flavors to meld and develop. While you can eat macarons immediately after filling, they truly reach their peak texture and flavor after 24-48 hours of maturation.
Final Thoughts
Mastering macarons takes practice and patience, but the reward is well worth the effort. Remember that even professional pastry chefs occasionally have macaron mishaps—it’s part of the journey! Each batch teaches you something new about your technique, ingredients, and baking environment.
The true secret to perfect macarons isn’t just in the recipe but in understanding how each step contributes to the final result. Pay attention to the details, trust the process, and soon you’ll be creating batches of perfect macarons that not only look professional but taste divine.
So preheat your oven, pull out your digital scale, and embrace the wonderful world of macaron making. I’d love to hear about your macaron adventures and see your creations. Happy baking!