Have you ever craved those delicious triangular pastries filled with spiced potatoes that you get at your favorite Indian restaurant? I certainly have! For years, I thought making samosas at home would be an intimidating process reserved only for expert cooks. But after numerous attempts and a lot of flour-covered countertops, I’ve perfected an easy potato samosa recipe that anyone can make at home.
Today, I’m thrilled to share my foolproof method for creating these crispy, flavorful treats without the complexity. Whether you’re hosting a dinner party or just want to enjoy a special snack with your evening tea, these homemade samosas will surely impress everyone who tastes them.
The History and Significance of Samosas
Samosas have a rich history that dates back centuries. Originally from the Middle East and Central Asia, these savory pastries made their way to the Indian subcontinent around the 13th or 14th century. Traditionally, samosas were filled with minced meat, but over time, vegetarian versions featuring potatoes and peas became incredibly popular across India and eventually worldwide.
What makes samosas so special is their versatility—they can be served as appetizers, snacks, or even as part of a main meal. In many households, samosas are a staple during celebrations and festivals. The triangular shape isn’t just for aesthetics; it also makes them easy to eat by hand, which is how they’re typically enjoyed.
What Makes This Recipe Special
My easy potato samosa recipe stands out for several reasons:
- Simplified dough technique: I’ve removed unnecessary steps while maintaining the perfect texture
- Pre-cooked potato filling: This ensures even cooking and seasoning distribution
- Baking option: For those who prefer a healthier alternative to deep-frying
- Make-ahead friendly: Components can be prepared in advance for quick assembly
- Freezable: Perfect for batch cooking and enjoying later
Let’s dive into the ingredients you’ll need to create these delicious treats!
Ingredients
For the Dough:
- 2 cups all-purpose flour
- ¼ teaspoon salt
- 2 tablespoons vegetable oil or ghee
- ½ cup cold water (approximately)
For the Filling:
- 4 medium potatoes (about 1.5 pounds)
- 2 tablespoons vegetable oil
- 1 teaspoon cumin seeds
- 1 medium onion, finely chopped
- 2 green chilies, finely chopped (adjust according to spice preference)
- 1 tablespoon ginger-garlic paste
- ½ cup frozen peas
- ½ teaspoon turmeric powder
- 1 teaspoon ground coriander
- 1 teaspoon ground cumin
- 1 teaspoon garam masala
- ¼ teaspoon red chili powder (optional)
- Salt to taste
- 2 tablespoons fresh cilantro, chopped
- 1 tablespoon lemon juice
For Frying/Baking:
- 3 cups vegetable oil (for deep frying) OR
- 2 tablespoons oil (for brushing if baking)
For Assembling:
- 2 tablespoons all-purpose flour
- 3 tablespoons water (to make paste for sealing edges)
Equipment Needed
Before we begin preparing our samosas, let’s make sure we have all the necessary equipment:
- Medium mixing bowl
- Rolling pin
- Clean kitchen cloth
- Large pot or deep pan
- Medium saucepan
- Slotted spoon
- Knife and cutting board
- Potato masher or fork
- Small bowl for flour paste
- Baking sheet (if baking samosas)
- Parchment paper (if baking)
- Kitchen thermometer (helpful but not essential)
Preparation Time
| Task | Time Required |
|---|---|
| Preparing the dough | 15 minutes |
| Resting the dough | 30 minutes |
| Preparing the filling | 30 minutes |
| Cooling the filling | 15-20 minutes |
| Shaping and filling samosas | 30 minutes |
| Frying or baking | 15-20 minutes |
| Total Time | Approximately 2 hours |
Detailed Instructions
Making the Perfect Samosa Dough
- In a medium bowl, combine the flour and salt, mixing well.
- Add the oil or ghee to the flour mixture and rub it in with your fingertips until the mixture resembles breadcrumbs. This process is critical as it helps create flaky layers in the final pastry.
- Gradually add cold water, a little at a time, while kneading the dough. You might not need all the water—aim for a firm but pliable dough.
- Knead the dough on a clean surface for about 5-7 minutes until smooth and elastic.
- Cover the dough with a damp cloth or plastic wrap and let it rest for at least 30 minutes. This resting period allows the gluten to relax, making the dough easier to roll out.
I’ve found that the quality of your dough makes a huge difference in how your samosas turn out. Too soft, and they’ll absorb too much oil; too hard, and they’ll be difficult to work with and taste tough when cooked.
Preparing the Flavorful Potato Filling

- Boil the potatoes in their skins until fork-tender (about 15-20 minutes). Once cooked, drain, cool slightly, peel, and roughly chop them.
- Heat the oil in a medium saucepan over medium heat. Add the cumin seeds and wait until they start to sizzle and become fragrant.
- Add the chopped onions and sauté until they turn translucent and golden around the edges (about 5-7 minutes).
- Add the green chilies and ginger-garlic paste. Cook for another 2 minutes, stirring frequently to prevent burning.
- Add all the dry spices (turmeric, coriander, cumin, garam masala, red chili powder if using) and salt. Stir for about 30 seconds to toast the spices and release their aromas.
- Add the chopped potatoes to the pan and mash them coarsely with a fork or potato masher directly in the pan. You want some texture, not a completely smooth mixture.
- Add the frozen peas and mix well. Cook for 3-4 minutes until the peas are heated through.
- Turn off the heat and add the fresh cilantro and lemon juice. Mix well and allow the filling to cool completely before using it to fill your samosas.
While the filling cools, I often taste it to adjust the seasonings. The filling should be flavorful with a balance of spices—not bland, but not overpowering either.
Shaping and Filling the Samosas
- Make a simple paste by mixing 2 tablespoons of flour with 3 tablespoons of water in a small bowl. This will act as the “glue” to seal your samosas.
- Divide the rested dough into 10-12 equal portions and roll each portion into a smooth ball.
- Working with one ball at a time (keep the others covered to prevent drying), roll it into a thin circle about 6 inches in diameter.
- Cut the circle in half with a knife, giving you two semicircles.
- Take one semicircle and fold it into a cone shape, overlapping the straight edges slightly and sealing with a little of the flour paste.
- Hold the cone in your hand, with the pointed end facing downward, and fill it with approximately 1-2 tablespoons of the potato filling. Don’t overfill—leave about ¼ inch space at the top.
- Seal the top edge by applying the flour paste along the open edge and pressing firmly to close. Make sure there are no gaps or holes.
- Repeat with the remaining dough and filling.
I like to place my shaped samosas on a lightly floured tray as I work, making sure they don’t touch each other to prevent sticking.
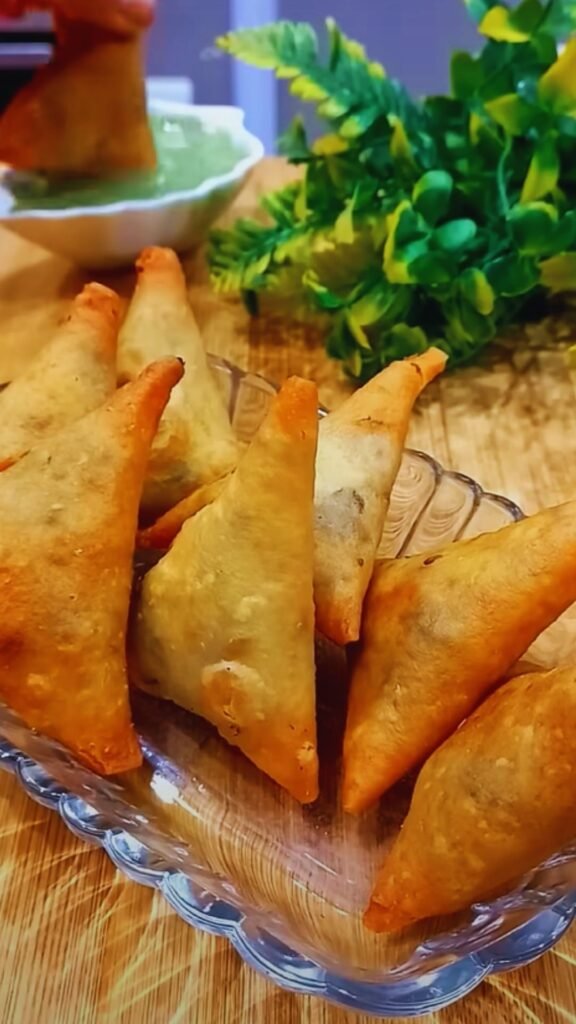
Cooking Options
Deep Frying (Traditional Method)
- Heat oil in a deep pot to 350°F (175°C). If you don’t have a thermometer, test by dropping a small piece of dough into the oil—it should rise to the surface gradually with bubbles around it.
- Gently slide 3-4 samosas into the hot oil, being careful not to overcrowd the pot.
- Fry until golden brown on all sides, turning occasionally with a slotted spoon. This usually takes about 4-5 minutes per batch.
- Once golden and crisp, remove them with a slotted spoon and place on paper towels to drain excess oil.
- Continue with the remaining samosas in batches.
Baking (Healthier Alternative)
- Preheat your oven to 375°F (190°C) and line a baking sheet with parchment paper.
- Place the prepared samosas on the baking sheet, leaving some space between each.
- Brush each samosa generously with oil on all sides.
- Bake for 25-30 minutes, flipping halfway through, until golden brown and crisp on both sides.
Though baking results in a slightly different texture than the traditional fried version, it’s still delicious and significantly reduces the oil content.
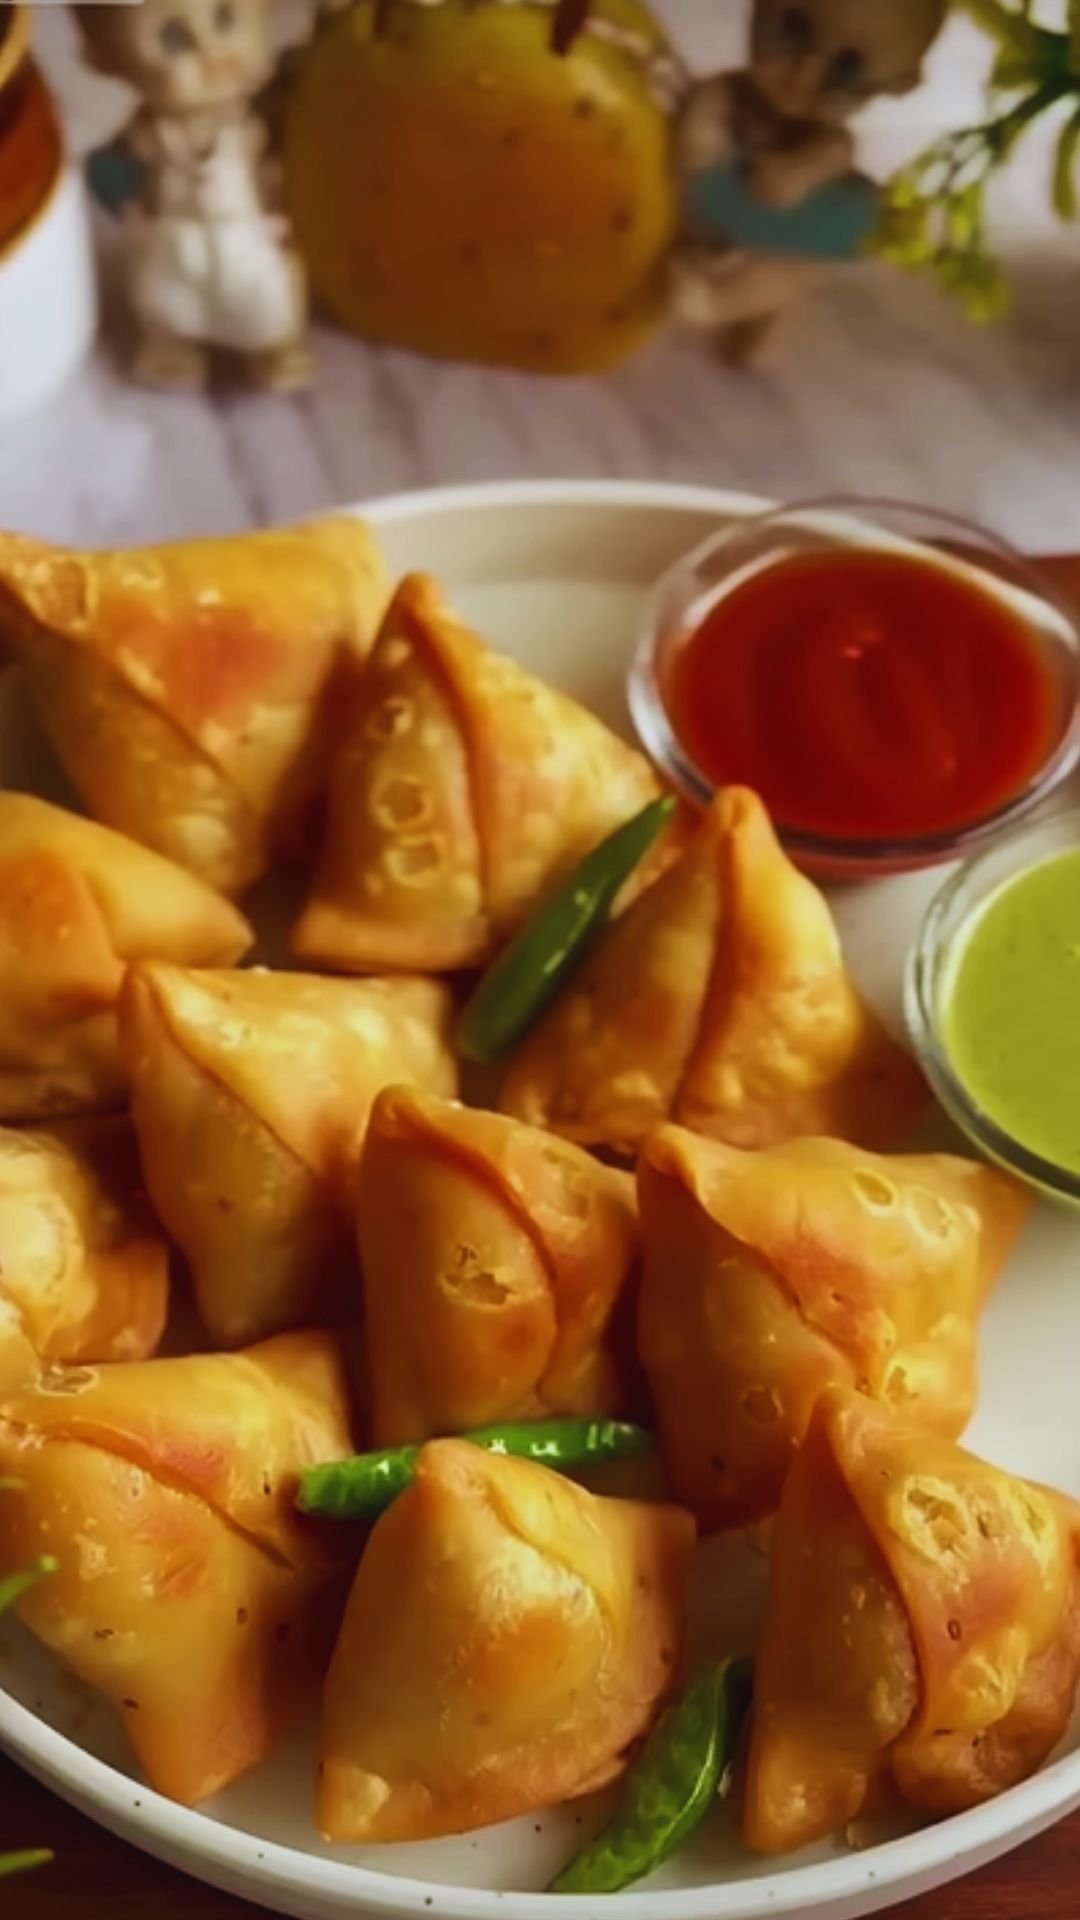
Serving Suggestions
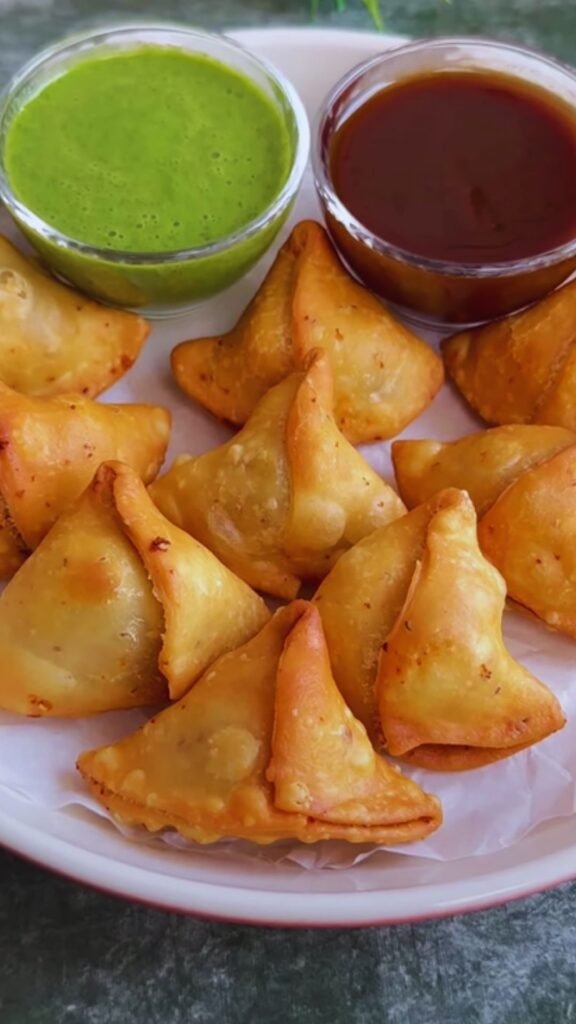
Samosas are incredibly versatile when it comes to serving. Here are some of my favorite ways to enjoy them:
Accompaniments:
- Mint-coriander chutney (blend fresh mint, cilantro, green chilies, lemon juice, and a touch of sugar)
- Tamarind chutney (sweet and tangy)
- Plain yogurt or raita (yogurt with cumin, salt, and chopped cucumber)
- Ketchup (a non-traditional but popular option, especially with kids)
Serving Ideas:
- As an appetizer before an Indian meal
- Part of a chai-time snack spread
- In a “chaat” style with yogurt, chutneys, and chickpeas
- As a side dish with a simple dal (lentil soup)
- In a lunch box with a small container of chutney
For a complete meal, I sometimes serve samosas with a fresh salad and a bowl of chickpea curry. The combination of flavors and textures creates a satisfying dining experience.
Storage and Reheating Tips
One of the best things about samosas is that they can be prepared in advance and stored for later enjoyment. Here’s how I handle leftovers:
Storing Cooked Samosas:
- Refrigeration: Store in an airtight container for up to 3 days
- Freezing: Place in a single layer on a tray to freeze individually, then transfer to a freezer bag or container. They’ll keep for up to 3 months
Reheating Options:
| Method | Time | Instructions |
|---|---|---|
| Oven | 10-12 minutes | Preheat to 350°F (175°C), place on baking sheet |
| Air Fryer | 5-6 minutes | 350°F (175°C), turning halfway |
| Microwave | 30-60 seconds | Wrap in slightly damp paper towel (Note: lacks crispness) |
| Stovetop | 2-3 minutes per side | Low heat in a covered pan with a splash of water |
Make-Ahead Options:
- Prepare the filling and dough up to 48 hours in advance and store separately in the refrigerator
- Shape uncooked samosas and freeze them on a tray, then transfer to freezer bags once solid
- Cook frozen uncooked samosas directly from frozen, adding a few extra minutes to the cooking time
Troubleshooting Common Issues
Even with this simplified recipe, things can sometimes go wrong. Here are solutions to common samosa-making problems:
Dough Issues:
- Too sticky: Add a little more flour, a tablespoon at a time
- Too dry and cracking: Add a few drops of water at a time while kneading
- Samosas opening during frying: Ensure edges are well-sealed with flour paste
Filling Issues:
- Too wet filling: Cook a bit longer to evaporate excess moisture
- Bland taste: Adjust salt and spices according to preference
- Too spicy: Add a boiled potato or some yogurt to mellow it out
Cooking Problems:
- Oil too hot (samosas browning too quickly): Reduce heat immediately
- Oil not hot enough (greasy samosas): Increase heat and ensure proper temperature before adding more
- Baked samosas not browning: Brush with more oil and increase oven temperature slightly
Variations to Try
Once you’ve mastered the basic recipe, here are some delicious variations to experiment with:
Alternative Fillings:
- Spiced cauliflower and peas
- Paneer (Indian cottage cheese) with spinach
- Minced vegetables with cashews
- Sweet filling with coconut, cardamom, and jaggery (unrefined cane sugar)
Dough Variations:
- Whole wheat dough: Replace half the all-purpose flour with whole wheat flour
- Herbed dough: Add dried fenugreek leaves or chopped cilantro to the dough
- Spiced dough: Add a pinch of ajwain (carom) seeds or cumin seeds
Size Variations:
- Mini samosas: Perfect for parties and finger food
- Jumbo samosas: A more substantial snack or light meal
- Samosa patties: Flatten the filling between two dough circles for a quicker version
Health and Dietary Adaptations
For those with specific dietary needs, samosas can be adapted while maintaining their delicious flavor:
Gluten-Free:
- Replace all-purpose flour with a gluten-free flour blend
- Add ¼ teaspoon xanthan gum if your blend doesn’t include it
- Rest the dough for an additional 15 minutes for better workability
Vegan:
- Use vegetable oil instead of ghee in the dough
- Ensure your garam masala doesn’t contain any animal products
Lower-Fat Options:
- Bake instead of fry
- Use an air fryer if available (375°F/190°C for about 10-12 minutes)
- Reduce oil in the filling by using non-stick cookware
Questions and Answers
Q: Can I prepare samosas in advance for a party?
Yes, absolutely! You have several options for advance preparation:
- Make the dough and filling up to 2 days ahead and store them separately in the refrigerator.
- Shape the samosas and refrigerate them (uncooked) for up to 24 hours.
- Fully cook the samosas, cool completely, and refrigerate for up to 3 days. Reheat in a 350°F oven for 10 minutes before serving.
- For longer storage, freeze shaped uncooked samosas for up to 3 months, or cooked samosas for up to 2 months.
Q: My samosas always burst open when frying. What am I doing wrong?
This is usually due to one of three issues:
- The seams aren’t sealed properly. Make sure to use enough flour paste on the edges and press firmly.
- Air bubbles are trapped inside. When filling, gently press the filling down to remove air pockets.
- The oil temperature is too high. Maintain oil at around 350°F (175°C) and don’t overcrowd the pan.
Q: Can I use store-bought pastry sheets instead of making dough from scratch?
While traditional samosas use homemade dough, you can certainly use alternatives like:
- Spring roll wrappers (thinner but workable)
- Filo/phyllo dough (will give a flakier texture)
- Puff pastry (for a different but delicious variation)
Just be aware that the texture and taste will differ from authentic samosas. If using these alternatives, you may need to adjust cooking times and techniques.
Q: How can I make the filling less spicy for my children?
To make a milder filling:
- Omit the green chilies or reduce to just a small piece for flavor
- Skip the chili powder entirely
- Reduce the garam masala to ½ teaspoon
- Add a peeled, grated apple or ¼ cup of grated carrot to the potato mixture to add natural sweetness
- Serve with yogurt on the side to balance any remaining heat
Q: Why is my samosa dough tough rather than flaky?
Flaky samosa dough relies on:
- Properly incorporating the oil/ghee into the flour until it resembles breadcrumbs
- Not overworking the dough (knead just until smooth)
- Allowing proper resting time (at least 30 minutes)
- Using cold water for mixing
- Rolling the dough thin enough (about 1/8 inch thickness)
Q: Can I add meat to this recipe?
Yes, you can add cooked minced meat to create a non-vegetarian version:
- Cook 1 pound of ground meat (chicken, lamb, or beef) with the same spices used in the potato filling
- Drain any excess fat
- You can either mix it with the potato filling or use it as a complete replacement
- Ensure the meat is cooled completely before filling the samosas
Final Tips for Perfect Samosas
After years of making samosas, I’ve gathered these essential tips that make all the difference:
- Patience is key: Don’t rush the process, especially when shaping and sealing the samosas
- Temperature matters: Room temperature dough and cooled filling make handling easier
- Consistent sizing: Try to keep your samosas uniform in size for even cooking
- Oil temperature: Too hot will burn the outside before cooking the inside; too cool will make them greasy
- Draining properly: Always drain fried samosas on paper towels to remove excess oil
- Taste as you go: Adjust seasonings in your filling before assembling
- Practice makes perfect: Don’t be discouraged if your first few samosas look irregular—they’ll still taste delicious!
I hope this comprehensive guide helps you create delicious homemade samosas that will impress your family and friends. The first time I successfully made these at home, I felt such a sense of accomplishment! They’ve since become a regular feature at my dinner parties and family gatherings. With a little practice, you’ll soon be creating perfect samosas with ease.
Remember, cooking is about enjoyment and sharing, so don’t stress too much about perfection. Even imperfectly shaped samosas taste wonderful when made with care and good ingredients. Happy cooking!