After years of experimenting in my kitchen, I’ve discovered that baked chicken thighs are the unsung heroes of weeknight dinners. Unlike their leaner breast counterparts, thighs remain succulent and forgiving, even when I’ve gotten distracted by a phone call or helping with homework. Today, I’m sharing everything I’ve learned about creating the perfect baked chicken thighs that will have your family asking for seconds.
The beauty of chicken thighs lies in their higher fat content and connective tissue, which translates to more flavor and moisture retention during cooking. I’ve found that when prepared correctly, they develop a gorgeous golden-brown skin that crackles when you bite into it, revealing tender, juicy meat underneath.
Understanding Chicken Thighs: The Foundation of Great Flavor
Before diving into my tried-and-true techniques, let me share what makes chicken thighs special. These cuts come from the upper portion of the chicken’s leg and contain both the thigh bone and surrounding meat. The higher fat content compared to breast meat means they’re incredibly forgiving during cooking.
Bone-in vs. Boneless Thighs : Bone-in thighs retain more moisture and flavor during cooking, as the bone acts as a heat conductor and helps prevent overcooking. Boneless thighs cook faster but require more attention to prevent drying out.
Skin-on vs. Skinless : Skin-on thighs provide natural protection against moisture loss and develop that coveted crispy exterior. Skinless varieties are leaner but need careful monitoring to maintain juiciness.
Dark Meat Benefits : The higher myoglobin content in thigh meat contributes to its richer flavor profile and darker color. This same characteristic makes it more resistant to overcooking than white meat.
My Essential Preparation Techniques
Over the years, I’ve refined my preparation process to ensure consistent results every time. The key lies in proper seasoning, temperature control, and timing.
Temperature and Food Safety
I always use a meat thermometer to ensure my chicken thighs reach the safe internal temperature of 165°F (74°C). However, I’ve learned that dark meat actually benefits from cooking to 175°F (79°C), as this higher temperature helps break down the connective tissues, resulting in more tender meat.
Seasoning Strategies
My approach to seasoning has evolved considerably since I first started cooking. I now prefer to season my thighs at least 30 minutes before cooking, allowing the salt to penetrate the meat and enhance its natural flavors. For even better results, I often season them the night before and refrigerate them uncovered, which helps dry out the skin for better crisping.
The Perfect Basic Baked Chicken Thighs Recipe
This is my go-to method that never fails to deliver restaurant-quality results at home.
Ingredients (Serves 4-6)
| Ingredient | Amount | Purpose | Substitutions |
|---|---|---|---|
| Bone-in, skin-on chicken thighs | 8 pieces (2.5-3 lbs) | Main protein | Boneless (reduce cooking time) |
| Kosher salt | 2 teaspoons | Flavor enhancement | Sea salt (same amount) |
| Black pepper | 1 teaspoon | Seasoning | White pepper |
| Garlic powder | 1 teaspoon | Aromatic base | Fresh garlic (3 cloves, minced) |
| Paprika | 1 teaspoon | Color and mild heat | Smoked paprika for deeper flavor |
| Olive oil | 2 tablespoons | Moisture and browning | Avocado oil or melted butter |
| Fresh thyme | 1 tablespoon | Herbaceous note | Dried thyme (1 teaspoon) |
| Lemon juice | 2 tablespoons | Brightness | Lime juice or white wine vinegar |
Step-by-Step Instructions
- Preheat and Prepare: I set my oven to 425°F (220°C) and line a rimmed baking sheet with parchment paper for easy cleanup.
- Pat Dry Thoroughly: Using paper towels, I pat each thigh completely dry. This step is crucial for achieving crispy skin.
- Season Generously: In a large bowl, I combine all the dry seasonings, then rub the mixture all over the thighs, making sure to get under the skin where possible.
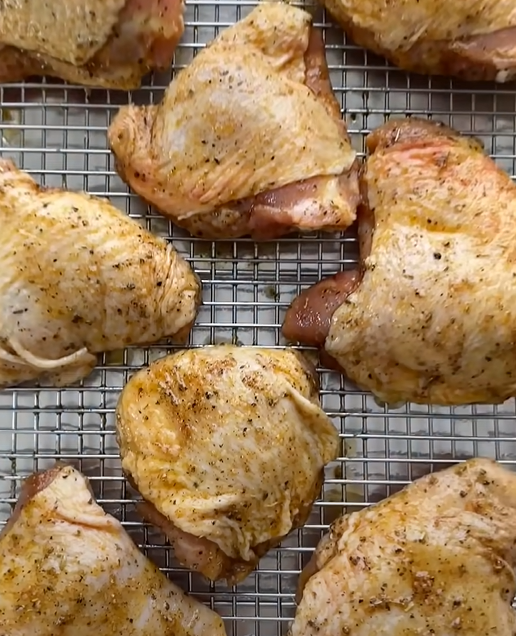
- Oil and Arrange: I drizzle the olive oil over the seasoned thighs and arrange them skin-side up on the prepared baking sheet, ensuring they don’t touch each other.
- Initial High Heat: I bake for 25 minutes at 425°F to develop the crispy skin.
- Reduce and Finish: I then reduce the temperature to 375°F (190°C) and continue cooking for 15-20 minutes until the internal temperature reaches 175°F.
- Rest Before Serving: I always let the thighs rest for 5 minutes before serving to allow the juices to redistribute.
Advanced Flavor Variations
Once you’ve mastered the basic technique, these variations will keep your dinner rotation exciting.
Mediterranean Herb Blend
| Ingredient | Amount | Flavor Profile |
|---|---|---|
| Dried oregano | 2 teaspoons | Earthy, pine-like |
| Dried basil | 1 teaspoon | Sweet, peppery |
| Garlic powder | 1 teaspoon | Savory umami |
| Lemon zest | 2 tablespoons | Bright citrus |
| Olive oil | 3 tablespoons | Rich, fruity |
This combination transports me straight to the Greek islands. I often serve these with roasted vegetables and a dollop of tzatziki.
Asian-Inspired Glaze
| Component | Ingredient | Amount | Purpose |
|---|---|---|---|
| Base | Soy sauce | 3 tablespoons | Umami foundation |
| Sweetness | Honey | 2 tablespoons | Caramelization |
| Heat | Sriracha | 1 tablespoon | Spicy kick |
| Aromatics | Fresh ginger | 1 tablespoon, grated | Warm spice |
| Acid | Rice vinegar | 1 tablespoon | Balance |
I brush this glaze onto the thighs during the last 10 minutes of cooking for a beautiful lacquered finish.
Smoky BBQ Style
For those days when I’m craving barbecue flavors but don’t want to fire up the grill, this dry rub delivers incredible results.
| Spice | Amount | Flavor Contribution |
|---|---|---|
| Brown sugar | 2 tablespoons | Sweetness and caramelization |
| Smoked paprika | 2 teaspoons | Smoky depth |
| Chili powder | 1 teaspoon | Mild heat and complexity |
| Cumin | 1 teaspoon | Earthy warmth |
| Garlic powder | 1 teaspoon | Savory base |
| Onion powder | 1 teaspoon | Sweet aromatics |
| Cayenne pepper | 1/4 teaspoon | Heat level |
Troubleshooting Common Issues
Throughout my cooking journey, I’ve encountered various challenges with baked chicken thighs. Here’s how I’ve learned to overcome them.
Soggy Skin Solutions
Nothing disappoints me more than flabby chicken skin. I’ve discovered several techniques to ensure crispy results every time:
- Proper Drying: I spend extra time patting the skin completely dry with paper towels
- Salt Timing: Salting 30 minutes to overnight before cooking draws out moisture
- High Initial Heat: Starting at 425°F helps render the fat quickly
- Avoid Crowding: I leave space between thighs for proper air circulation
- Wire Rack Method: Sometimes I use a wire rack on the baking sheet to elevate the thighs
Preventing Overcooking
Even though thighs are forgiving, they can still dry out if overcooked. My strategies include:
- Thermometer Usage: I never rely on visual cues alone
- Lower Final Temperature: Reducing heat after the initial browning phase
- Bone-in Preference: The bone helps regulate internal temperature
- Resting Period: Allowing carry-over cooking to finish the process
Nutritional Benefits and Considerations
Chicken thighs offer several nutritional advantages that make them an excellent choice for family meals.
Nutritional Breakdown (per 100g cooked, skinless)
| Nutrient | Amount | Daily Value % |
|---|---|---|
| Protein | 26g | 52% |
| Fat | 9g | 14% |
| Iron | 1.3mg | 7% |
| Zinc | 2.4mg | 22% |
| Vitamin B6 | 0.3mg | 18% |
| Niacin | 6.2mg | 39% |
| Selenium | 22mcg | 40% |
| Phosphorus | 180mg | 26% |
The higher fat content in thighs provides essential fatty acids and helps with the absorption of fat-soluble vitamins. The iron content is particularly noteworthy for those following low-red-meat diets.
Side Dish Pairings and Menu Planning
I’ve found that the rich flavor of baked chicken thighs pairs beautifully with various sides that complement rather than compete with the main dish.
Vegetable Companions
| Vegetable | Preparation Method | Cooking Time | Flavor Notes |
|---|---|---|---|
| Brussels sprouts | Halved and roasted | 25-30 minutes | Nutty, slightly bitter |
| Sweet potatoes | Cubed and seasoned | 30-35 minutes | Sweet, earthy |
| Asparagus | Trimmed and drizzled | 15-20 minutes | Grassy, fresh |
| Carrots | Baby or chunked | 25-30 minutes | Sweet, tender |
| Green beans | Trimmed and tossed | 20-25 minutes | Crisp, vegetal |
Starch Options
I often choose starches that can cook alongside the chicken or require minimal additional preparation:
- Roasted baby potatoes with herbs
- Wild rice pilaf with cranberries and almonds
- Garlic mashed cauliflower for a lower-carb option
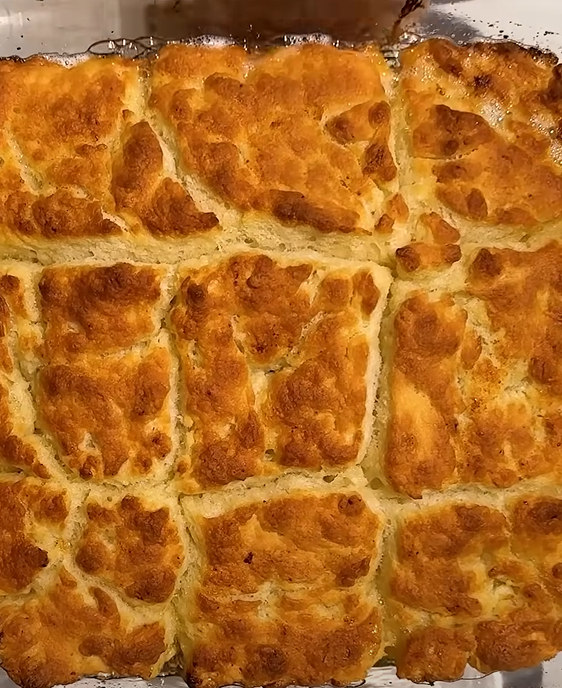
- Herb-crusted dinner rolls for a comforting touch
Storage and Meal Prep Strategies
Baked chicken thighs are excellent for meal preparation, and I often make extra portions for busy weekdays.
Proper Storage Guidelines
| Storage Method | Duration | Temperature | Best Practices |
|---|---|---|---|
| Refrigerator | 3-4 days | 40°F or below | Airtight containers |
| Freezer | 2-3 months | 0°F or below | Vacuum-sealed bags |
| Room temperature | 2 hours max | Below 90°F | Food safety zone |
Reheating Techniques
I’ve experimented with various reheating methods and found these work best:
- Oven method: 350°F for 15-20 minutes, covered with foil
- Skillet method: Medium heat with a splash of broth
- Microwave: 50% power in 30-second intervals (skin won’t crisp)
Seasonal Adaptations
I love adapting my chicken thigh recipes to reflect seasonal ingredients and flavors throughout the year.
Spring Fresh Herb Medley
During spring, I incorporate fresh herbs from my garden: tarragon, chives, and parsley create a bright, verdant flavor profile that pairs beautifully with asparagus and new potatoes.
Summer Mediterranean Escape
Hot summer days call for lighter preparations. I use plenty of fresh basil, oregano, and a squeeze of lemon juice, serving the thighs at room temperature with a Greek salad.
Fall Harvest Warmth
Autumn inspires me to use warming spices like cinnamon, allspice, and sage. I often pair these with roasted root vegetables and a drizzle of maple syrup.
Winter Comfort Combinations
Cold weather demands heartier preparations. I lean into rich, warming spices and serve the thighs with creamy mashed potatoes and roasted Brussels sprouts.
Questions and Answers
Q: How do I know when my baked chicken thighs are perfectly cooked?
I always rely on a meat thermometer inserted into the thickest part of the thigh, avoiding the bone. The internal temperature should reach 165°F for food safety, but I prefer 175°F for the most tender texture. The juices should run clear, and the skin should be golden brown and crispy.
Q: Can I use frozen chicken thighs for this recipe?
While fresh thighs give the best results, you can use frozen ones if properly thawed. I always thaw them completely in the refrigerator, which usually takes 24 hours for a package of 8 thighs. Never try to cook frozen thighs, as they’ll cook unevenly and won’t develop proper browning.
Q: Why do my chicken thighs sometimes turn out dry?
Dry chicken thighs usually result from overcooking or insufficient fat. I recommend using bone-in, skin-on thighs for the most moisture retention. Also, avoid cooking at temperatures higher than 425°F for extended periods, and always use a meat thermometer to prevent overcooking.
Q: How can I make the skin extra crispy without overcooking the meat?
My secret is the two-temperature method: start at 425°F for the first 25 minutes to crisp the skin, then reduce to 375°F to finish cooking gently. Also, make sure to pat the skin completely dry before seasoning, and consider salting the thighs 30 minutes to overnight before cooking.
Q: What’s the best way to season chicken thighs for maximum flavor?
I’ve found that seasoning at least 30 minutes before cooking allows the salt to penetrate the meat properly. For even better results, I season them the night before and refrigerate uncovered. This not only improves flavor but also helps dry out the skin for better crisping.
Q: Can I cook vegetables alongside my chicken thighs?
Absolutely! I often add vegetables to the same pan during the last 20-30 minutes of cooking. Root vegetables like potatoes, carrots, and onions work particularly well. Just make sure to cut them into similar-sized pieces for even cooking.
Q: How do I prevent my chicken thighs from sticking to the pan?
I always line my baking sheet with parchment paper or use a light coating of cooking spray. Make sure your pan is properly preheated, and avoid moving the thighs until they’ve had a chance to develop a crust, which naturally releases them from the surface.
Q: What should I do if my chicken thighs are browning too quickly?
If the skin is browning faster than the meat is cooking, I tent the thighs loosely with aluminum foil and reduce the oven temperature by 25°F. This allows the meat to finish cooking without the skin burning.
Q: How long should I let my baked chicken thighs rest before serving?
I always let my chicken thighs rest for 5-10 minutes after removing them from the oven. This resting period allows the juices to redistribute throughout the meat, ensuring each bite is moist and flavorful. Cover them loosely with foil to keep them warm during this time.
Q: Can I marinate chicken thighs before baking them?
Yes, marinating can add wonderful flavor depth to chicken thighs. I typically marinate them for 2-24 hours in the refrigerator. However, be careful with acidic marinades (containing citrus juice or vinegar) as they can start to “cook” the meat if left too long, potentially creating a mushy texture.
Baked chicken thighs have become my go-to protein for countless family dinners, and I hope these techniques and tips help you create memorable meals in your own kitchen. The forgiving nature of dark meat combined with proper technique creates a dish that’s both impressive enough for guests and simple enough for weeknight dining. Remember, practice makes perfect, so don’t be afraid to experiment with different seasonings and techniques until you find your perfect combination.