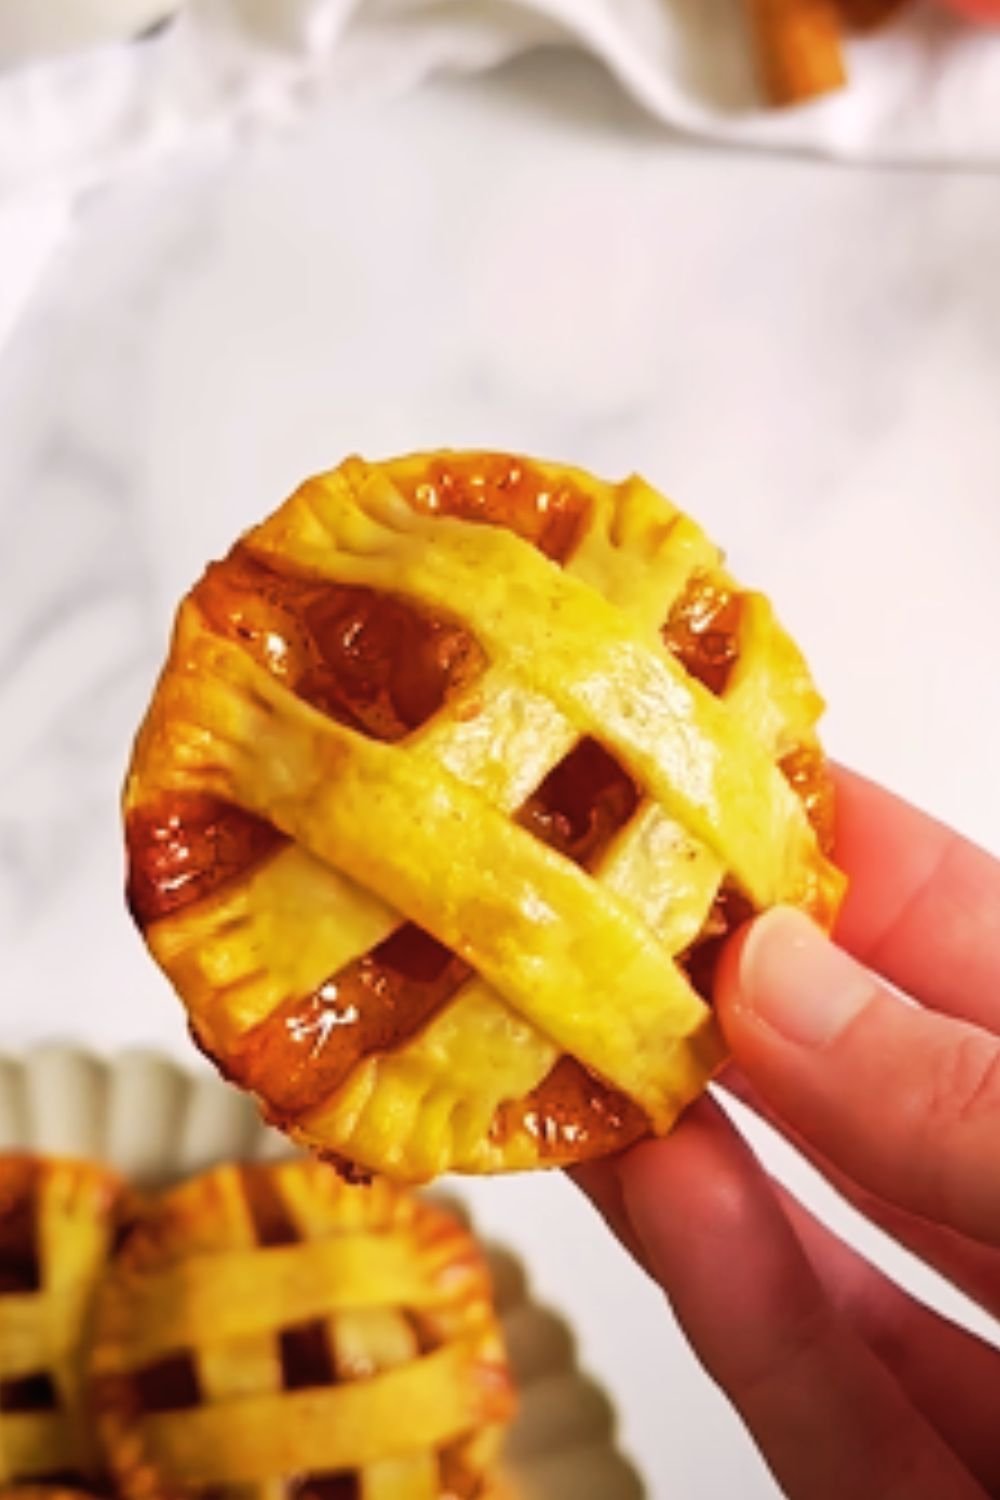
There’s something irresistibly charming about mini pies. These bite-sized versions of our favorite comfort desserts combine the best of both worlds – all the delicious flavors of a traditional pie packed into an adorable, portable package. As someone who’s spent countless hours perfecting the art of mini pie-making, I’m excited to share my comprehensive guide to creating these delightful treats.
Whether you’re preparing for a holiday gathering, planning a dessert table for a special occasion, or just want to treat yourself to something sweet without the commitment of a full-sized pie, mini pies are the perfect solution. In this article, I’ll walk you through everything from dough preparation to creative fillings and presentation tips that will make your mini pies the star of any table.
The Magic of Mini Pies
Mini pies aren’t just smaller versions of their full-sized counterparts – they offer unique advantages that make them worth mastering:
- Portion control: Each guest gets their own complete pie experience
- Variety: Serve multiple flavors at once without making several full pies
- Faster baking: Mini pies require less time in the oven
- Reduced waste: Perfect for small households
- Freezer-friendly: Make ahead and freeze for future enjoyment
- Gift-giving: Package beautifully as homemade gifts
Essential Equipment for Mini Pie Success
Before diving into recipes and techniques, let’s talk about the equipment that will make your mini pie journey smoother:
| Equipment | Purpose | Recommended Features | Price Range |
|---|---|---|---|
| Mini muffin tin | For tiny, bite-sized pies | Non-stick, 24-cup capacity | $15-30 |
| Standard muffin tin | For individual serving pies | Heavy-gauge, non-stick | $12-25 |
| Mini pie pans | For slightly larger individual pies | 5-inch diameter, removable bottoms | $20-40 set |
| Pastry cutter | For creating perfectly sized crusts | Sharp edges, comfortable grip | $10-15 |
| Cookie cutters | For decorative top crusts | Various sizes and shapes | $8-20 set |
| Rolling pin | For even dough thickness | Smooth rolling surface | $15-30 |
| Pastry brush | For egg washes and glazes | Silicone bristles for easy cleaning | $5-10 |
Having the right tools on hand will make the process much more enjoyable and your results more consistent. While specialized equipment can be helpful, many of these items serve multiple purposes in your kitchen.
Mastering Mini Pie Crusts
The foundation of any great pie is its crust. For mini pies, you’ll need to make some adjustments to ensure perfect results every time.
My Foolproof Mini Pie Crust Recipe
Ingredients:
- 2½ cups all-purpose flour
- 1 tsp salt
- 1 tbsp granulated sugar
- 1 cup cold unsalted butter, cubed
- ¼ to ⅓ cup ice water
- 1 tbsp apple cider vinegar (my secret ingredient!)
Instructions:
- In a large bowl, whisk together flour, salt, and sugar.
- Add the cold butter cubes and use a pastry cutter or your fingertips to work the butter into the flour until the mixture resembles coarse crumbs with some pea-sized pieces remaining.
- Mix the ice water and apple cider vinegar in a small bowl.
- Gradually add the liquid to the flour mixture, stirring with a fork until the dough just begins to come together. You may not need all the liquid.
- Turn the dough onto a lightly floured surface and gently knead just until it forms a cohesive mass. Divide into two portions, flatten into disks, wrap in plastic, and refrigerate for at least 1 hour.
Crust Troubleshooting Guide
| Problem | Cause | Solution |
|---|---|---|
| Tough crust | Overworked dough | Handle minimally and keep ingredients cold |
| Shrinking crust | Stretched dough during shaping | Let dough rest before baking and use pie weights |
| Soggy bottom | Filling too wet | Pre-bake (blind bake) crusts before adding filling |
| Crumbly dough | Too little moisture | Add water 1 tsp at a time until dough holds together |
| Dough sticking | Surface or rolling pin not floured | Use adequate flour during rolling and chill dough if too soft |
Special Considerations for Mini Pie Crusts
When working with mini pies, I’ve learned several techniques that make a world of difference:
- Roll thinner than for regular pies: Aim for about 1/8 inch thickness to maintain proper crust-to-filling ratio.
- Chill cut-out shapes before handling: After cutting your dough into circles or shapes, place them back in the refrigerator for 10 minutes to firm up, making them easier to transfer to your tins.
- Use a measuring cup to shape: A small measuring cup can help press dough evenly into mini muffin tins.
- Pre-bake for wet fillings: For fruit or custard fillings, blind bake the crusts for 5-7 minutes before adding filling to prevent sogginess.
- Create a double-batch workflow: While one batch bakes, prepare the next so you can work efficiently.
Filling Ideas for Every Occasion
The beauty of mini pies is the ability to offer variety. Here are some of my tested and loved filling recipes that work perfectly in miniature form:
Fruit Fillings
Classic Apple Mini Pies
- 3 cups finely diced apples (Granny Smith or Honeycrisp)
- ¼ cup granulated sugar
- 2 tbsp brown sugar
- 1 tbsp all-purpose flour
- ½ tsp ground cinnamon
- ¼ tsp ground nutmeg
- 1 tbsp lemon juice
- Pinch of salt
Combine all ingredients and let sit for 15 minutes before filling. For mini pies, dice fruit smaller than you would for a standard pie.
Berry Bliss Mini Pies
- 2 cups mixed berries (blueberries, raspberries, blackberries)
- ⅓ cup granulated sugar
- 2 tbsp cornstarch
- 1 tsp lemon zest
- 1 tbsp lemon juice
Gently mix all ingredients, being careful not to crush the berries.
Creamy Fillings
Mini Lemon Meringue Pies
- 1 cup granulated sugar
- ¼ cup cornstarch
- 1½ cups water
- 3 egg yolks, beaten
- ¼ cup fresh lemon juice
- 1 tbsp lemon zest
- 2 tbsp butter
- For meringue: 3 egg whites + ¼ cup sugar
Cook the filling until thickened, fill pre-baked mini crusts, top with meringue, and briefly torch or bake until golden.
Chocolate Ganache Minis
- 1 cup heavy cream
- 8 oz high-quality chocolate, chopped
- 1 tsp vanilla extract
- Pinch of salt
Heat cream, pour over chocolate, let sit 2 minutes, then stir until smooth. Pour into pre-baked crusts and chill.
Savory Options
Mini pies aren’t just for dessert! Try these savory options for appetizers or light meals:
Mini Quiche Pies
- 4 eggs
- ½ cup heavy cream
- 1 cup mixed fillings (cheese, cooked vegetables, herbs, bacon)
- Salt and pepper to taste
Whisk eggs and cream, fold in fillings, pour into crusts, and bake until set.
Chicken Pot Pie Minis
- 1 cup cooked chicken, diced small
- ½ cup frozen mixed vegetables, thawed
- ¼ cup diced onion, sautéed
- ½ cup chicken gravy
- ½ tsp dried thyme
- Salt and pepper to taste
Mix all ingredients, fill crusts, top with a second crust, and bake until golden.
Baking Techniques and Timing
Baking mini pies requires adjustments to both temperature and timing compared to full-sized pies. Here’s my guide to perfect baking:
| Pie Size | Temperature | Baking Time | Visual Cues for Doneness |
|---|---|---|---|
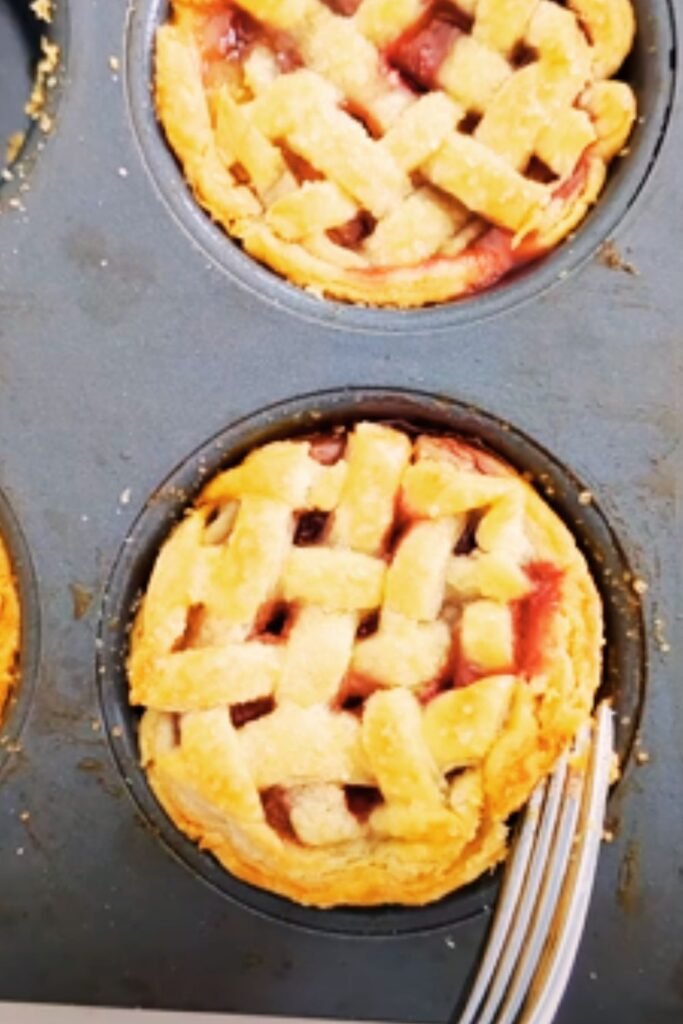
| Mini muffin tin (1-2 inch) | 375°F | 15-18 minutes | Edges golden brown, filling bubbling slightly |
| Standard muffin tin (2-3 inch) | 375°F | 20-25 minutes | Crust golden all over, filling set or bubbling |
| 5-inch mini pie pan | 350°F | 25-30 minutes | Evenly browned crust, filling set or bubbling vigorously |
My Top Baking Tips
- Always place your tins on a baking sheet: This catches any overflow and makes transferring multiple pies easier.
- Rotate halfway through baking: For even browning, especially important in smaller ovens.
- Cover edges with foil if browning too quickly: Mini pies can brown faster due to their size.
- Use an oven thermometer: Accuracy is crucial with these shorter baking times.
- Allow for steam release: Cut vents in top crusts or use decorative cutouts to let steam escape.
- Cool in the pan for 10 minutes: This helps mini pies set up before removal.
Decorative Touches and Presentation
Half the charm of mini pies is their appearance. Here are my favorite ways to make them visually stunning:
Top Crust Variations
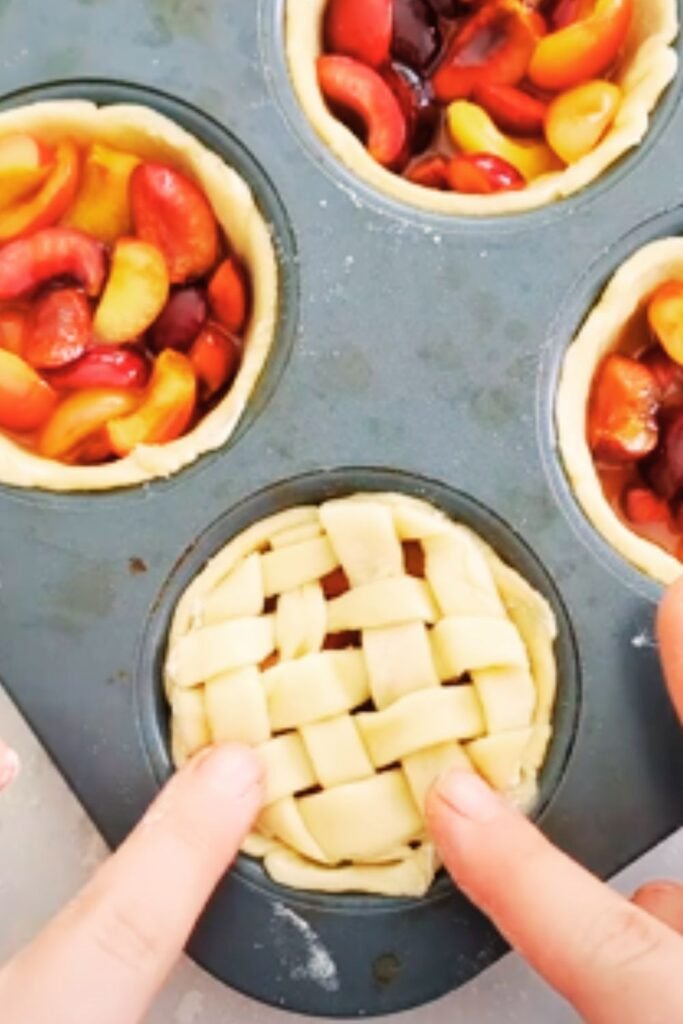
- Lattice tops: Use a pizza cutter to create thin strips for miniature lattice work
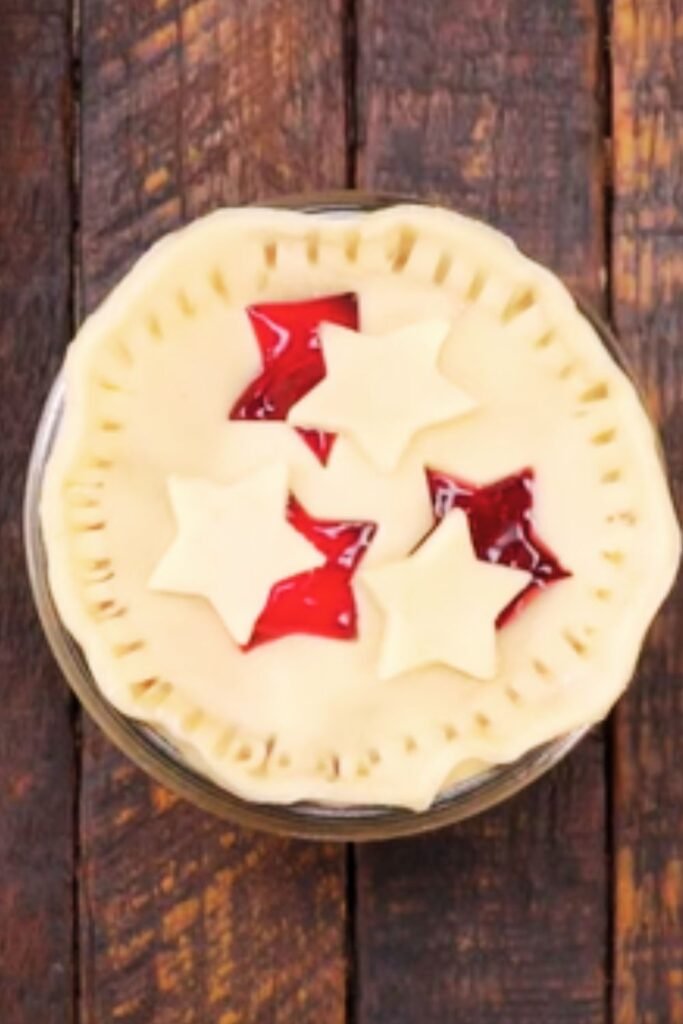
- Cutout designs: Use tiny cookie cutters for seasonal shapes (stars, hearts, leaves)
- Crumble toppings: Mix equal parts flour, sugar, and cold butter for a streusel effect
- Braided edges: Roll thin ropes of dough and braid for an elegant rim
- Stamped patterns: Use small stamps or the back of a fork for decorative impressions
Finishing Touches
Sweet Glazes and Washes:
- Egg wash (1 egg + 1 tbsp water): For golden shine
- Milk wash: For gentle browning
- Cream wash: For rich color and slight sheen
- Egg white + water: For sparkly finish with sugar
- Sugar sprinkles: Apply before baking for sweet crunch
Savory Finishes:
- Egg yolk wash: For deep golden color
- Herbs and sea salt: Sprinkle on before baking
- Cheese: Grated parmesan or sharp cheddar on top
- Seeds: Sesame, poppy, or caraway for texture and flavor
Serving and Storage Solutions
Creative Serving Ideas
I love finding unique ways to present mini pies:
- Tiered display: Use a cupcake stand to create a “pie tower”
- Individual packaging: Place in cupcake liners with clear cellophane bags tied with ribbon
- Dessert bar: Offer a selection with small cards identifying flavors
- A la mode: Serve with tiny scoops of ice cream on the side
- Garnish plates: Dust plates with powdered sugar, cocoa, or cinnamon before placing pies
Make-Ahead and Storage Tips
| Storage Method | Time Frame | Best For | Notes |
|---|---|---|---|
| Room temperature | 1-2 days | Fruit pies | Cover loosely with plastic wrap |
| Refrigerator | 3-4 days | Cream, custard pies | Store in airtight container |
| Freezer (unbaked) | 2-3 months | Most fillings | Freeze on sheet then transfer to container |
| Freezer (baked) | 1-2 months | Fruit, nut pies | Thaw in refrigerator overnight |
My Freezing Method for Perfect Results:
- Place assembled unbaked pies on a baking sheet
- Freeze until solid (about 2 hours)
- Transfer to freezer bags or containers
- Label with date and variety
- When ready to bake, add 3-5 minutes to regular baking time
Troubleshooting Common Mini Pie Problems
Even experienced bakers encounter issues. Here are solutions to the most common mini pie problems:
| Issue | Cause | Solution |
|---|---|---|
| Filling bubbles over | Overfilled pies | Fill only ⅔ full and cut adequate vents |
| Pies stick to pan | Inadequate greasing | Use non-stick spray and/or parchment paper rounds |
| Uneven baking | Oven hot spots | Rotate pans and use middle rack position |
| Pale, undercooked bottom | Insufficient heat | Use dark metal pans and lower rack position |
| Filling too runny | Inadequate thickener | Increase cornstarch or flour in filling |
| Difficult removal from pan | Removal while too hot | Cool 10 minutes in pan before attempting removal |
Rescuing Less-Than-Perfect Pies
When things don’t go according to plan, try these fixes:
- Too pale: Brush with melted butter and broil briefly
- Slightly overbaked: Serve with a sauce, whipped cream, or ice cream
- Soggy bottoms: Reheat on a baking sheet at 350°F for 5-7 minutes
- Cracked filling: Top with a decorative element like whipped cream or a fruit slice
Seasonal Mini Pie Ideas
Adapt your mini pies to the seasons for the freshest flavors and most appropriate treats:
Spring:
- Strawberry rhubarb with ginger crumble
- Lemon curd with fresh berries
- Asparagus and goat cheese savory tarts
Summer:
- Peach and blackberry with almond streusel
- Key lime with toasted coconut
- Heirloom tomato and basil savory tarts
Fall:
- Pumpkin chai with candied pepitas
- Apple cranberry with oat crumble
- Mushroom and gruyere savory tarts
Winter:
- Peppermint chocolate ganache
- Eggnog custard with nutmeg
- Caramelized onion and brie savory tarts
Mini Pie FAQs
Q: Can I use store-bought pie crust for mini pies? Yes, absolutely! Store-bought crusts work well for mini pies and save time. For best results, let the dough warm slightly at room temperature before rolling it slightly thinner than it comes in the package.
Q: How do I prevent my mini pie crusts from shrinking? The key is to avoid stretching the dough when placing it in the pans. Always cut your circles slightly larger than needed, and chill the shaped crusts for 15-20 minutes before baking. Using pie weights during pre-baking also helps.
Q: My mini pies are browning too quickly but aren’t cooked through. What should I do? Cover the pies loosely with aluminum foil once they reach your desired color, then continue baking until the filling is done. You can also try lowering your oven temperature by 25 degrees and baking a bit longer.
Q: How full should I fill each mini pie? For most fillings, about ⅔ full is ideal. Fruit fillings may need slightly less space as they tend to bubble up during baking. Custard fillings should be filled nearly to the top as they don’t expand much.
Q: Can mini pies be made ahead for a party? Absolutely! Most mini pies can be prepared completely 1-2 days ahead and stored properly. Alternatively, prepare and freeze the unbaked pies up to 3 months ahead, then bake them fresh on the day of your event.
Q: What’s the best way to transport mini pies to an event? I use cupcake carriers, which work perfectly for muffin-tin sized pies. For smaller or larger sizes, place pies in a single layer in a shallow box or tray with a rim, and use crumpled parchment paper between pies to prevent shifting.
Q: How can I make gluten-free mini pies? Substitute a gluten-free flour blend in your crust recipe, adding ¼ teaspoon xanthan gum if it’s not already included in the blend. Gluten-free crusts can be more fragile, so handle with extra care and consider using parchment liners in your pans.
Q: My mini pie fillings are too watery. How can I fix this? For fruit fillings, try mixing the fruit with sugar and letting it sit for 30 minutes, then draining excess liquid before adding thickeners. Increasing your thickener (cornstarch, flour, or tapioca) by about 25% compared to regular pies also helps compensate for the higher crust-to-filling ratio in mini pies.
Serving Suggestions
Complete your mini pie experience with these complementary items:
- Sweet accompaniments: Freshly whipped cream, vanilla bean ice cream, warm caramel sauce
- Coffee pairings: Serve fruit pies with bright, acidic coffees; chocolate pies with darker roasts
- Tea selections: Earl Grey with citrus pies, chai with apple or pumpkin, herbal teas with berry
- Savory sides: Pair savory mini pies with a simple green salad dressed with vinaigrette
- Garnishes: Fresh mint, basil, or edible flowers add a professional touch
I find that offering a few carefully chosen accompaniments elevates the mini pie experience without overwhelming your guests with too many options.
Conclusion
Mini pies offer endless possibilities for creativity while delivering all the comfort and satisfaction of traditional pies. With the techniques, recipes, and troubleshooting tips in this guide, you’re well-equipped to create perfect mini pies for any occasion.
Remember that practice makes perfect – each batch you make will improve your skills and instincts. Don’t be afraid to experiment with flavors, decorative touches, and presentations that reflect your personal style. The joy of mini pies is that even imperfect ones are delicious, and their small size makes them perfect for testing new ideas without committing to a full-sized pie.
I hope this guide inspires you to embrace the world of mini pies and discover the satisfaction of creating these charming treats. Happy baking!