There’s something undeniably magical about the first bite of a perfect pavlova. That delicate crunch giving way to a marshmallowy center, topped with clouds of softly whipped cream and vibrant blackberries bursting with summer sweetness. I’ve been perfecting my pavlova technique for years, and today I’m thrilled to share my favorite blackberry version with you.
As someone who has experienced both spectacular pavlova successes and a few disappointing puddles of collapsed meringue, I’m here to guide you through every step of creating this showstopping dessert. Whether you’re a seasoned baker or trying meringue for the first time, this recipe will have you creating beautiful blackberry pavlovas that will wow your friends and family.
The Fascinating History of Pavlova
Before we dive into whisking egg whites, let’s take a moment to appreciate the fascinating story behind this beloved dessert. The pavlova was named after the legendary Russian ballerina Anna Pavlova, who toured Australia and New Zealand in the 1920s. Both countries claim to be the birthplace of this dessert, and the debate continues to this day.
What isn’t disputed is how perfectly the dessert captures the essence of its namesake – with its crisp exterior representing the tutu and the soft interior symbolizing the graceful, ethereal quality of the dancer herself. I find it incredible how a simple combination of egg whites and sugar can transform into something that evokes such artistry and beauty.
Why Blackberries Make the Perfect Pavlova Topping
While pavlovas are traditionally topped with a variety of fruits, blackberries bring something special to the table:
- Perfect tang-to-sweet ratio: Their natural tartness cuts through the sweetness of the meringue for a balanced flavor profile
- Dramatic visual appeal: The deep purple-black color creates a stunning contrast against the white meringue and cream
- Seasonal celebration: Using blackberries at their peak celebrates summer’s bounty
- Nutritional boost: They add antioxidants and vitamin C to an otherwise indulgent dessert
I love foraging for wild blackberries in late summer, but store-bought varieties work beautifully too. The key is choosing plump, deeply colored berries with no signs of mold.
Essential Ingredients for Perfect Blackberry Pavlovas
Before we start baking, let’s look at each key ingredient and why it matters:
| Ingredient | Quantity | Purpose | Selection Tips |
|---|---|---|---|
| Egg whites | 4 large (about 120g) | Form the structure of the meringue | Room temperature eggs separate more easily; not a speck of yolk can be present |
| Superfine sugar | 1 cup (200g) | Sweetens and stabilizes the meringue | Also called caster sugar; regular granulated sugar can be pulsed in a food processor |
| Cornstarch | 1 tablespoon | Creates the marshmallowy center | Helps absorb any excess moisture |
| White vinegar | 1 teaspoon | Stabilizes the egg whites | Distilled white vinegar works best |
| Vanilla extract | 1 teaspoon | Adds depth of flavor | Pure extract rather than artificial flavoring |
| Heavy cream | 1 cup (240ml) | Creates the cloud-like topping | Choose high-fat content (36-40%) for best whipping results |
| Powdered sugar | 2 tablespoons | Sweetens the cream | Sift to remove lumps |
| Fresh blackberries | 2 cups (300g) | Star topping | Choose plump, firm berries with deep color |
| Blackberry preserves | 1/4 cup | Intensifies flavor | Optional; look for varieties with whole berries and minimal added sugar |
Secret Ingredients That Elevate Your Pavlova
After years of experimentation, I’ve discovered a few special additions that take blackberry pavlovas to the next level:
- A pinch of salt: Enhances sweetness without adding more sugar
- Lemon zest: A small amount in the cream brightens the flavor
- Fresh mint leaves: For a fragrant garnish that complements the blackberries
- Edible flowers: For special occasions, a few viola or pansy blossoms create a garden-worthy presentation
Kitchen Equipment You’ll Need
| Equipment | Purpose | Alternatives |
|---|---|---|
| Stand mixer or hand mixer | Whipping egg whites to stiff peaks | A whisk and extremely strong arm (not recommended!) |
| Large, clean metal or glass bowl | Prevents any grease from deflating egg whites | Avoid plastic bowls which can harbor grease |
| Parchment paper | Prevents sticking | Silicone baking mat works too |
| Baking sheet | Base for baking | Any flat oven-safe tray |
| Spatula | Shaping the pavlova | Spoon can work in a pinch |
| Measuring cups and spoons | Accuracy is key in baking | Digital scale is even better |
| Pastry bag (optional) | For decorative piping | Spoon works for a rustic look |
The Step-by-Step Process: Creating Individual Blackberry Pavlovas
Preparation Phase
- Preheat your oven to 300°F (150°C).
- Line a baking sheet with parchment paper.
- Trace 4-inch circles on the parchment paper as guides for your individual pavlovas (flip the paper over so you don’t get pencil marks on your meringue).
- Ensure your mixing bowl is absolutely clean and free from any grease.
- Separate your eggs while they’re cold (it’s easier), then allow the whites to come to room temperature for optimal volume.
Creating the Perfect Meringue Base
- Begin whisking egg whites on low speed until frothy.
- Increase to medium speed and whisk until soft peaks form.
- Gradually add the superfine sugar, one tablespoon at a time, while continuing to whisk.
- Increase to high speed and whisk until the meringue is glossy and forms stiff peaks (about 5-6 minutes).
- The test: you should be able to hold the bowl upside down without the meringue moving!
- Gently fold in cornstarch, vinegar, and vanilla extract with a metal spoon or rubber spatula.
Shaping and Baking
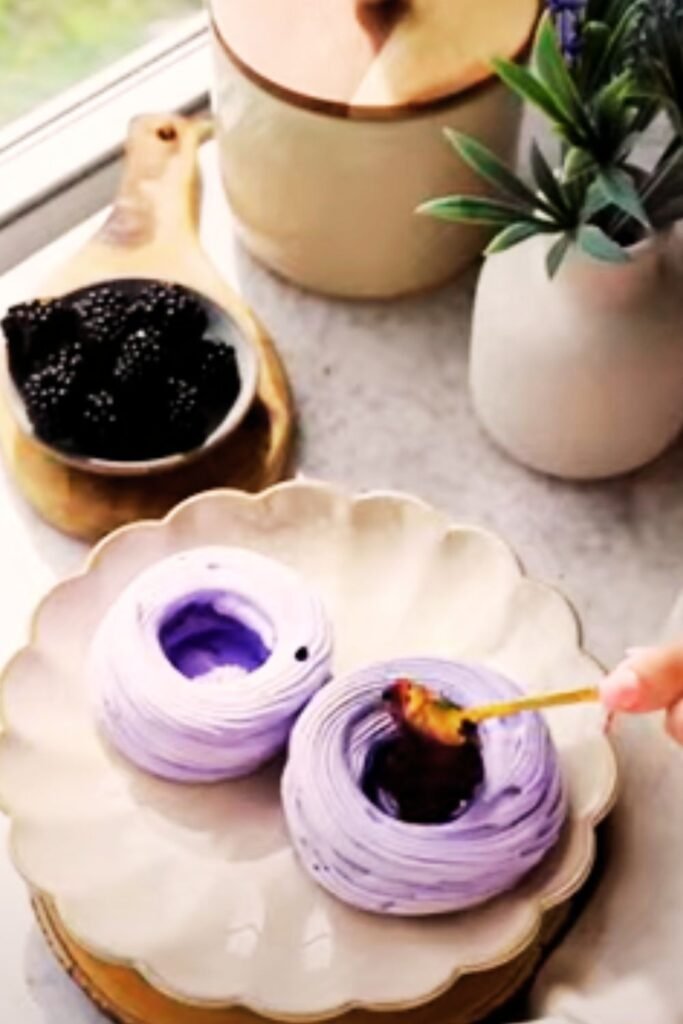
- Spoon or pipe the meringue onto the parchment paper, following your traced circles.
- Create a slight depression in the center of each pavlova to hold toppings later.
- Immediately reduce the oven temperature to 250°F (120°C) and place the pavlovas in the oven.
- Bake for 1 hour, then turn off the oven and leave the pavlovas inside with the door slightly ajar until completely cool (at least 1 hour, preferably overnight).
Blackberry Topping Preparation
- Reserve a handful of perfect blackberries for the top.
- Gently crush half of the remaining berries with a fork.
- Mix crushed berries with blackberry preserves if using.
- Whip heavy cream with powdered sugar and a touch of lemon zest until soft peaks form.
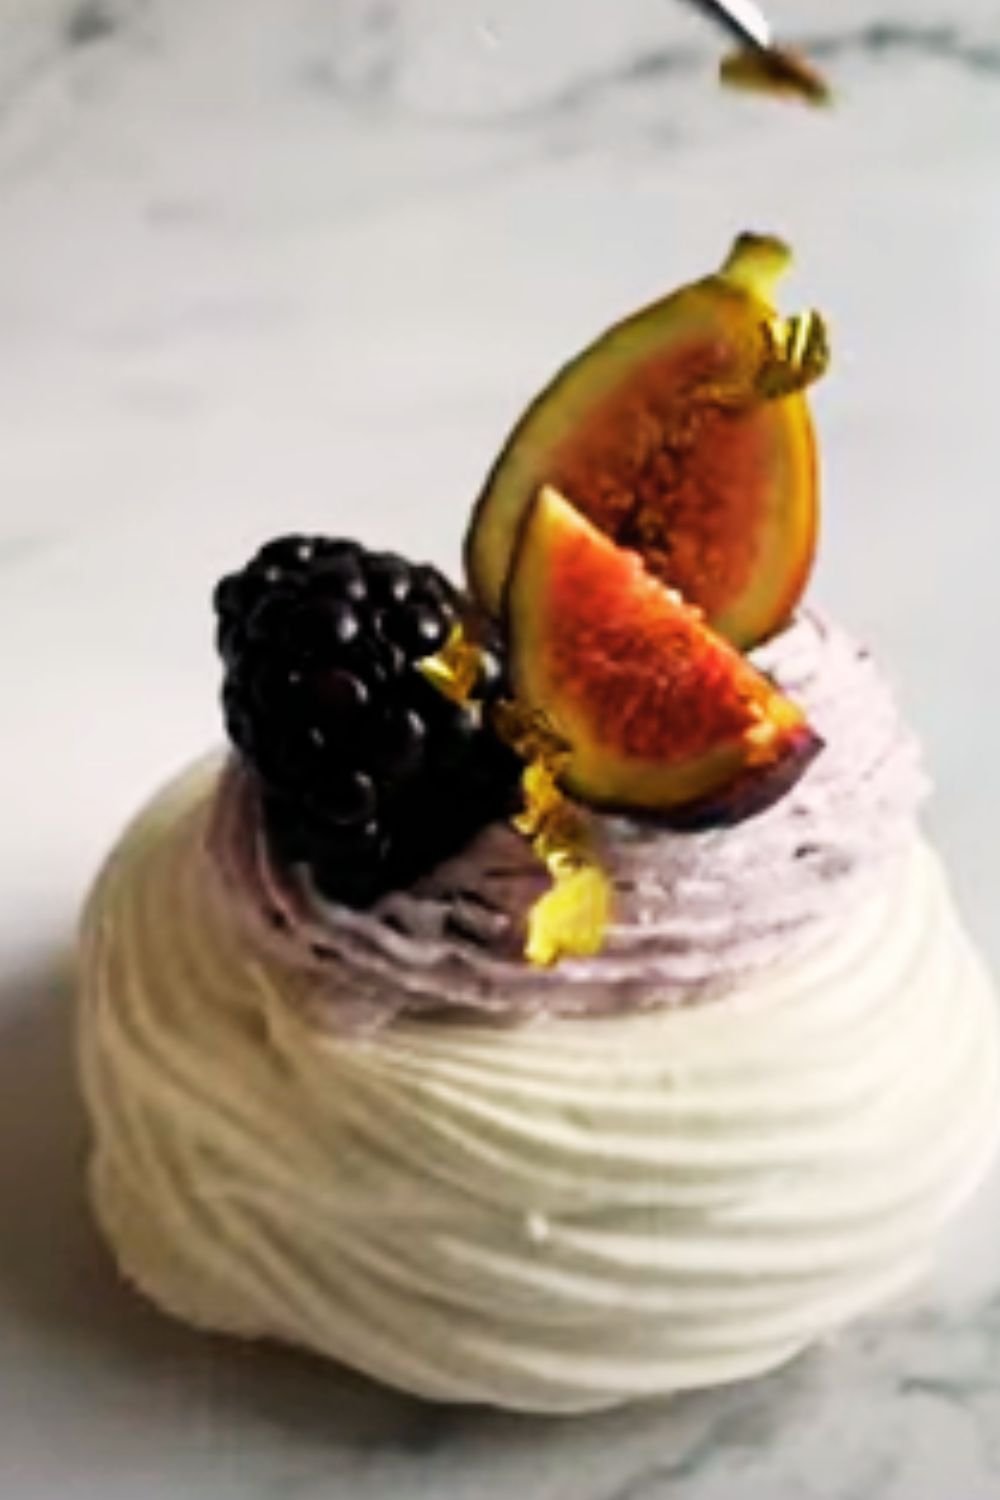
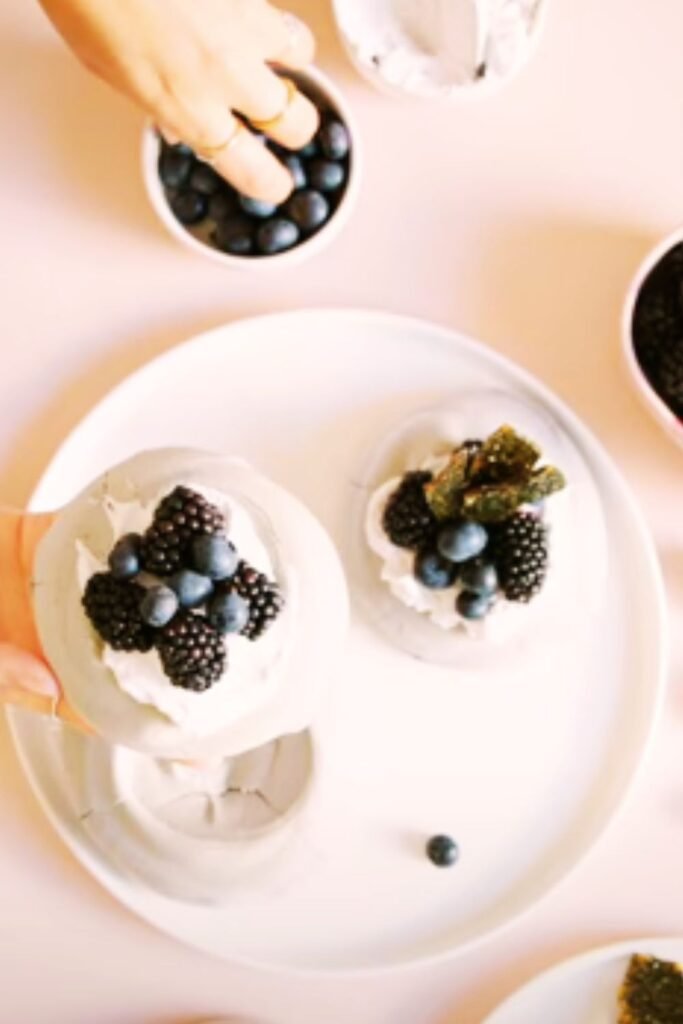
Assembly (Just Before Serving)
- Carefully place each meringue on a serving plate.
- Top with a generous dollop of whipped cream.
- Spoon the crushed blackberry mixture over the cream.
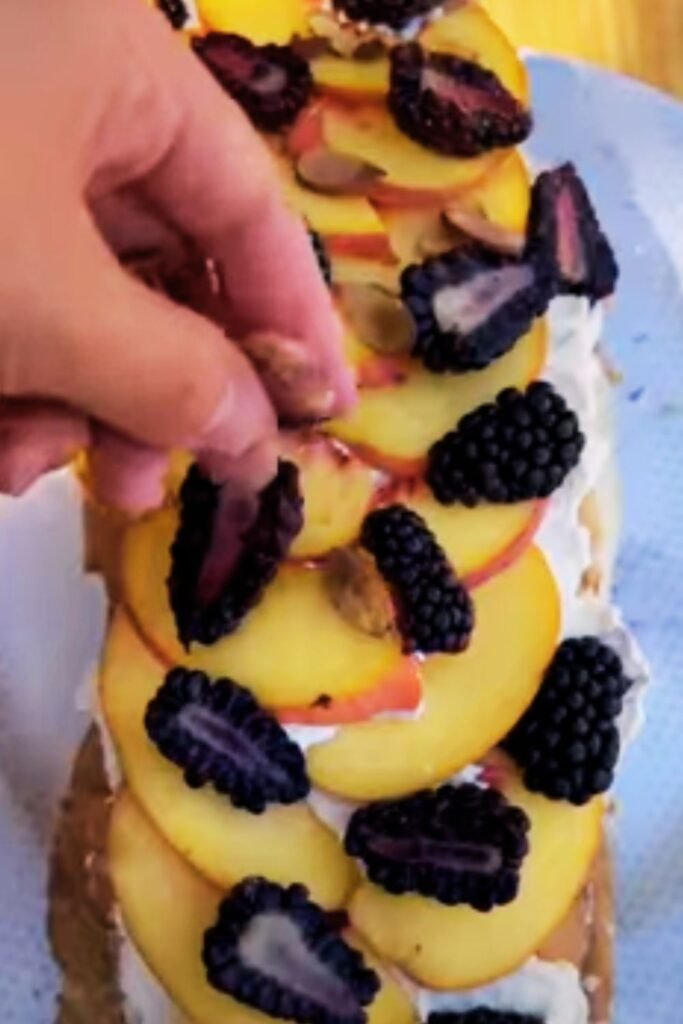
- Arrange whole fresh blackberries on top.
- Garnish with mint leaves and edible flowers if desired.
- Serve immediately to enjoy the perfect contrast of textures.
Troubleshooting Common Pavlova Problems
Even experienced bakers encounter pavlova problems. Here’s how to solve the most common issues:
| Problem | Possible Causes | Solutions |
|---|---|---|
| Weeping meringue | Sugar not fully dissolved, overbeaten whites | Add sugar gradually, rub meringue between fingers to check for graininess before baking |
| Collapsed pavlova | Opening the oven door too soon, underbaking | Cool gradually in the oven with door ajar, ensure adequate baking time |
| Cracked exterior | Too high oven temperature, too much cornstarch | Lower temperature, measure cornstarch precisely |
| Brown exterior | Oven too hot | Use an oven thermometer to verify temperature accuracy, position rack in middle of oven |
| Sticky center | Underbaking, humid weather | Increase baking time slightly, make on dry days if possible |
| Flat pavlova | Egg whites not beaten to stiff peaks, traces of yolk | Ensure no yolk contamination, beat until truly stiff |
I once made pavlovas on a particularly humid summer day and they were frustratingly sticky. I’ve learned to plan my pavlova baking for days with lower humidity or to compensate by extending the baking time slightly.
Variations: Taking Your Blackberry Pavlovas to New Heights
While the classic blackberry version is divine, here are some creative variations I’ve developed over the years:
Blackberry Lemon Pavlovas
Add lemon zest to the meringue and a tablespoon of lemon juice to the cream for a citrusy twist.
Chocolate Blackberry Pavlovas
Fold 2 tablespoons of sifted cocoa powder into the meringue and top with chocolate shavings along with the blackberries.
Spiced Blackberry Pavlovas
Add a pinch of cinnamon and cardamom to the meringue for a warming spice note that pairs beautifully with blackberries.
Mini Blackberry Pavlova Nests
Pipe small nests for bite-sized treats perfect for parties or afternoon tea.
Blackberry Thyme Pavlovas
Infuse the cream with fresh thyme for an unexpected herbal note that elevates the blackberry flavor.
Make-Ahead Tips for Stress-Free Entertaining
One of the things I love most about pavlovas is how much can be prepared ahead of time:
- The meringue bases can be made up to 2 days ahead and stored in an airtight container
- Whipped cream can be prepared a few hours ahead and refrigerated
- Blackberry sauce can be made a day ahead and refrigerated
- Final assembly should always be done just before serving to maintain the perfect texture contrast
Serving Suggestions and Presentation Ideas
The way you present your blackberry pavlovas can turn them from merely delicious to absolutely unforgettable:
- Serve on vintage plates with silver dessert forks for an elegant afternoon tea
- For summer gatherings, create a pavlova bar with the bases and various toppings for guests to assemble their own
- Dust with powdered sugar just before serving for a snow-kissed look
- Drizzle with a little honey for extra shine and sweetness
- Pair with a sparkling water infused with blackberries and mint for a refreshing non-alcoholic accompaniment
- For special occasions, place on a mirror or reflective surface with scattered edible flower petals
Nutritional Information and Dietary Adaptations
While pavlova is definitely a treat, here’s the approximate nutritional breakdown per serving (one individual pavlova with toppings):
| Nutrient | Amount | % Daily Value |
|---|---|---|
| Calories | 285 | – |
| Total Fat | 15g | 19% |
| Saturated Fat | 9g | 45% |
| Cholesterol | 53mg | 18% |
| Sodium | 75mg | 3% |
| Total Carbohydrates | 35g | 13% |
| Dietary Fiber | 3g | 11% |
| Total Sugars | 30g | – |
| Protein | 3g | 6% |
| Vitamin C | 15mg | 17% |
| Calcium | 42mg | 3% |
| Iron | 0.3mg | 2% |
Dietary Adaptations
For those with dietary restrictions, here are some adaptations I’ve successfully tested:
- Vegan version: Use aquafaba (the liquid from canned chickpeas) instead of egg whites
- Lower sugar: Reduce sugar to 3/4 cup in the meringue and use unsweetened whipped cream
- Dairy-free: Substitute coconut cream for the heavy cream (chill the can overnight first)
- Gluten-free: Traditional pavlova is naturally gluten-free, just verify your cornstarch is processed in a gluten-free facility
The Cultural Significance of Pavlova
As I’ve traveled and shared my love of baking, I’ve discovered that pavlova is more than just a dessert in Australia and New Zealand – it’s a cultural icon. It appears at Christmas celebrations (which occur during summer in the southern hemisphere), family gatherings, and national holidays.
The dessert represents both national pride and the friendly rivalry between the two countries. I find it fascinating how a simple meringue dessert can become so interwoven with cultural identity. Whenever I make pavlova, I feel connected to this rich tradition, even though I put my own spin on it with my blackberry variation.
Seasonal Adaptations Throughout the Year
While this recipe focuses on blackberries, which are at their peak in late summer, pavlova can be adapted for any season:
- Spring: Top with strawberries and rhubarb compote
- Early Summer: Use mixed berries and edible flowers
- Fall: Try poached pears with caramel drizzle
- Winter: Citrus segments with pomegranate seeds make a festive topping
The versatility of the pavlova base makes it a year-round dessert that can showcase whatever fruits are at their seasonal best.
Q&A Section: Your Burning Pavlova Questions Answered
After years of teaching baking classes, here are the questions I’m most frequently asked about pavlovas:
Q: Why did my pavlova collapse after baking? This usually happens when the pavlova is cooled too quickly. Always let it cool gradually in the turned-off oven with the door slightly ajar.
Q: Can I make pavlova in advance? Yes, the meringue bases can be made 1-2 days ahead and stored in an airtight container at room temperature. However, only add toppings just before serving.
Q: Why is my pavlova sticky on the inside? Some moisture in the center is normal – that’s what gives pavlova its signature marshmallowy texture. However, excessive stickiness might mean it needs more baking time or that humidity levels were high during baking.
Q: Can I freeze pavlova? You can freeze the baked meringue bases (without toppings) for up to 1 month. Thaw at room temperature in the container before adding toppings.
Q: What’s the difference between pavlova and meringue? Pavlova contains cornstarch and vinegar, which create a marshmallowy center, while traditional meringue is crisp throughout.
Q: My pavlova cracked dramatically. What went wrong? Some small cracks are normal and add to the rustic charm. Large cracks might be caused by drastic temperature changes or overbeating the egg whites.
Q: Can I use a different vinegar than white vinegar? Yes, you can substitute with apple cider vinegar or lemon juice, though the flavor might be slightly affected.
Q: How do I know when my egg whites are beaten to ‘stiff peaks’? When you lift the beater, the peaks should stand straight up without flopping over, and you should be able to hold the bowl upside down without anything falling out.
Final Thoughts: Why Blackberry Pavlovas Are Worth Mastering
There’s something truly special about presenting a homemade pavlova to friends and family. The collective “oohs” and “aahs” as you bring it to the table, the anticipation as you cut into it revealing the textural contrast between crisp exterior and soft interior, and finally the satisfied silence as everyone enjoys their first bite – these moments make the process worthwhile.
I believe that mastering pavlova is a milestone in any home baker’s journey. The techniques you’ll learn – properly whipping egg whites, achieving the perfect bake, and balancing flavors and textures – will serve you well in countless other baking endeavors.
Plus, there’s something magical about transforming humble ingredients like egg whites and sugar into something so spectacular. The blackberries add their own special magic – their intense color, bright flavor, and seasonal specialness elevate this dessert to something truly memorable.
So grab your mixer and some fresh blackberries, and embark on your own pavlova adventure. I promise that with a little practice, you’ll be creating desserts that not only taste divine but also create lasting memories around your table. Happy baking!