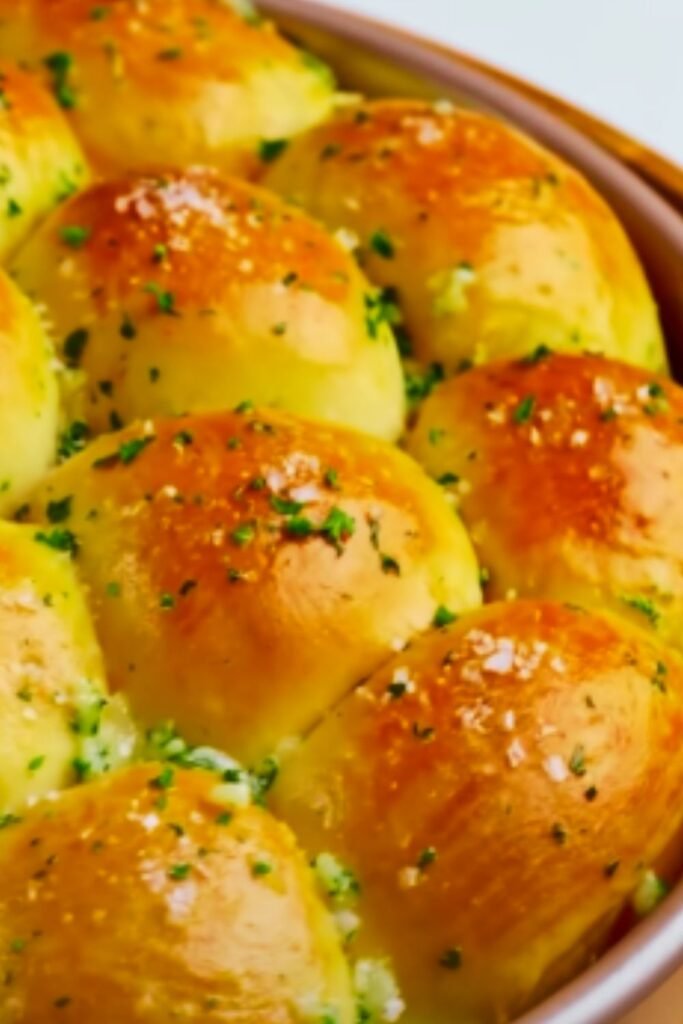
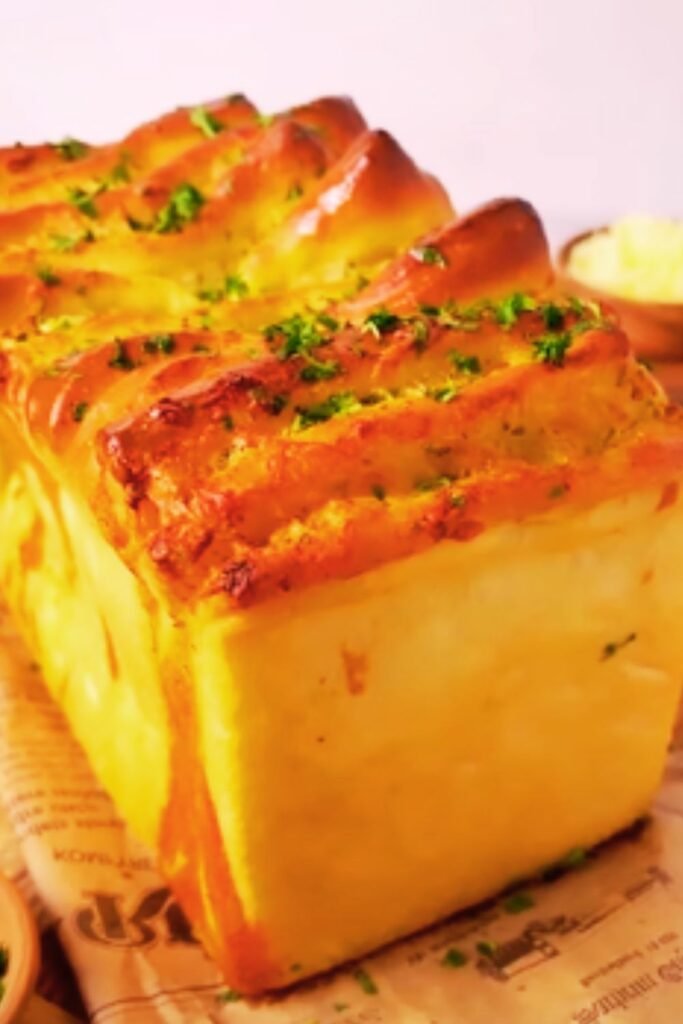
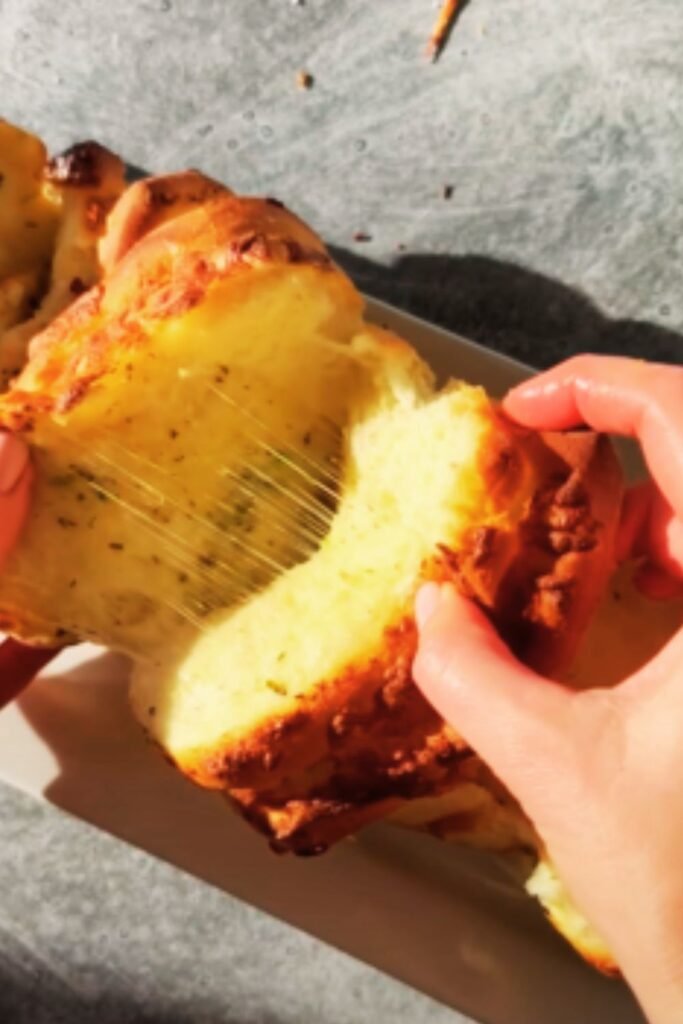
Have you ever watched someone pull apart a piece of freshly baked garlic bread, with strings of melted cheese stretching between each piece like a scene from a food commercial? That’s the magic of cheesy pull-apart garlic bread – a crowd-pleaser that transforms an ordinary meal into something extraordinary. I’ve spent years perfecting this recipe, and today I’m sharing all my secrets for creating this irresistible comfort food that will have your family and friends fighting for the last piece.
Why This Recipe Is Special
I remember the first time I attempted to make pull-apart garlic bread. It was for a family gathering, and while the flavor was decent, the texture was all wrong – some parts were dry, others doughy, and the cheese hadn’t melted properly. Fast forward dozens of attempts later, and I’ve nailed down a foolproof method that delivers consistently amazing results.
What makes this recipe special is the perfect balance of flavors and textures. The exterior develops a golden, buttery crust while the inside remains soft and fluffy. The garlic butter seeps into every crevice, and the combination of cheeses creates that Instagram-worthy cheese pull that makes everyone reach for their phones before diving in.
Ingredients You’ll Need
For the bread base, you have two options: make it from scratch (which I’ll guide you through) or use store-bought bread for a quicker version. Both are delicious, but there’s something special about the homemade version that takes this dish to another level.
For Homemade Bread Dough:
- 4 cups all-purpose flour
- 2¼ teaspoons active dry yeast (1 standard packet)
- 1 tablespoon granulated sugar
- 1½ teaspoons salt
- 1¼ cups warm milk (around 110°F)
- 3 tablespoons unsalted butter, melted
- 1 large egg, at room temperature
For Store-Bought Shortcut:
- 1 large round sourdough or Italian bread loaf (unsliced)
For the Garlic Butter Mixture:
- 1 cup (2 sticks) unsalted butter, softened
- 8 cloves garlic, minced (about 3 tablespoons)
- ¼ cup fresh parsley, finely chopped
- 2 tablespoons fresh thyme leaves (or 2 teaspoons dried)
- 1 tablespoon fresh rosemary, minced (or 1 teaspoon dried)
- 1 teaspoon Italian seasoning
- ½ teaspoon red pepper flakes (optional, for heat)
- 1 teaspoon salt
- ½ teaspoon black pepper
For the Cheese Filling:
- 2 cups mozzarella cheese, shredded
- 1 cup sharp cheddar cheese, shredded
- ½ cup Parmesan cheese, freshly grated
- ½ cup provolone cheese, shredded (optional, but adds amazing flavor)
Optional Add-ins:
- 3 green onions, thinly sliced
- 2 tablespoons sun-dried tomatoes, chopped
- 2 tablespoons roasted red peppers, diced
- 1 tablespoon caramelized onions
Kitchen Equipment Needed
- Stand mixer with dough hook (if making dough from scratch)
- Large mixing bowl
- Measuring cups and spoons
- Bread knife or sharp knife
- Cutting board
- Pastry brush
- Large baking dish or cast-iron skillet
- Aluminum foil
- Parchment paper
Making the Dough (Skip if Using Store-Bought Bread)
I’ve found that the key to amazing pull-apart bread starts with the dough itself. Here’s my step-by-step process:
- In the bowl of your stand mixer, combine the warm milk, sugar, and yeast. Let it sit for about 5-10 minutes until foamy. This tells you your yeast is alive and active.
- Add the melted butter, egg, salt, and 2 cups of flour. Using the dough hook attachment, mix on low speed until combined.
- Gradually add the remaining flour, ½ cup at a time, until the dough pulls away from the sides of the bowl. You might not need all the flour, or you might need a bit more – the humidity in your kitchen can affect this.
- Increase the speed to medium-low and knead for about 5-7 minutes until the dough is smooth and elastic. When you press your finger into the dough, it should spring back.
- Transfer the dough to a lightly oiled bowl, cover with plastic wrap or a clean kitchen towel, and let it rise in a warm place for about 1-1½ hours, or until doubled in size.
- After the first rise, punch down the dough and turn it out onto a lightly floured surface. Knead it a few times, then shape it into a round loaf.
- Place the shaped dough on a parchment-lined baking sheet, cover again, and let it rise for another 30-45 minutes until puffy.
- At this point, you can proceed to the cutting and filling steps below.
Preparing Store-Bought Bread
If you’re using a store-bought loaf (which is perfectly fine for busy weeknights!), here’s how to prepare it:
- Choose a sturdy round loaf that’s dense enough to hold up to the butter and cheese. Sourdough and Italian bread work wonderfully.
- Let the bread come to room temperature if it’s been refrigerated.
The Cutting Technique
The way you cut the bread is crucial for achieving that perfect pull-apart effect:
- Place your loaf on a cutting board. Using a sharp bread knife, make parallel cuts across the loaf, about 1 inch apart, but be careful not to cut all the way through the bottom crust. Leave about ¼ inch intact at the bottom.
- Rotate the loaf 90 degrees and make another set of parallel cuts, creating a grid pattern. Again, don’t cut all the way through.
- The result should be a grid of “cubes” that are still attached at the bottom, allowing the bread to stay together while being easy to pull apart when served.
The Magical Garlic Butter
The garlic butter is where the magic really happens. I’ve experimented with countless variations, and this combination provides the perfect flavor profile:
- In a medium bowl, combine the softened butter, minced garlic, chopped herbs, Italian seasoning, red pepper flakes (if using), salt, and pepper.
- Mix thoroughly until all ingredients are well incorporated. I like to use a fork to really mash everything together.
- Taste and adjust seasonings as needed. This is your chance to customize the flavor profile – add more garlic if you’re a garlic lover, or more herbs if you prefer a fresher taste.
The Cheese Mixture
A crucial component of great pull-apart bread is using the right cheese blend:
- In a separate bowl, combine all the shredded and grated cheeses.
- If using any of the optional add-ins like green onions or sun-dried tomatoes, mix them in with the cheese at this stage.
Assembly: Where It All Comes Together
Now for the fun part – bringing all the elements together:
- Preheat your oven to 350°F (175°C).
- Take your cut bread and place it on a large piece of aluminum foil or directly in a cast-iron skillet or baking dish.
- Using your fingers or a knife, gently pry open the cuts to create crevices.
- Take the garlic butter mixture and generously spread it into all the cuts. Be sure to get deep into the crevices. I like to use my fingers for this (it’s messy but effective), but you can also use a small spatula or knife.
- After the butter, stuff the cheese mixture into all the cuts. Again, make sure to get it deep into the crevices for maximum cheese pull effect.
- If the bread is on foil, wrap it loosely, leaving some space at the top for the cheese to melt without sticking.
Baking to Perfection
Baking temperature and time are critical for achieving that perfect balance of crispy exterior and gooey interior:
- Place the prepared bread in the preheated oven.
- Bake covered with foil for 15 minutes to allow the cheese to melt and the flavors to meld.
- Remove the foil and bake for an additional 10-15 minutes, or until the top is golden brown and the cheese is bubbly.
- Keep an eye on it during the last few minutes to prevent burning – every oven is different.
The Final Touch
Once your cheesy pull-apart garlic bread comes out of the oven, there are a few final touches that elevate it even further:
- If desired, sprinkle a bit more freshly grated Parmesan and chopped parsley over the top while it’s still hot.
- Let it cool for 5 minutes before serving – I know it’s tempting to dig in right away, but this brief rest allows the bread to set and makes it easier to pull apart without burning your fingers.
Serving Suggestions
This garlic bread is versatile enough to complement almost any meal:
- As a starter for an Italian feast alongside pasta dishes like lasagna or spaghetti
- With hearty soups like minestrone or tomato bisque
- Alongside a fresh green salad for a light lunch
- With grilled meats or roasted vegetables
- On its own as a fantastic appetizer for game day or parties
For a complete meal, I love serving this with a classic Caesar salad and a simple tomato-based pasta. The acidity of the tomato sauce perfectly balances the richness of the garlic bread.
Nutritional Information
While this isn’t exactly diet food, it’s good to know what you’re consuming. Here’s the approximate nutritional breakdown per serving (assuming 12 servings from one loaf):
| Nutrient | Amount per Serving |
|---|---|
| Calories | 320 |
| Total Fat | 21g |
| Saturated Fat | 13g |
| Cholesterol | 60mg |
| Sodium | 520mg |
| Total Carbohydrates | 24g |
| Dietary Fiber | 1g |
| Sugars | 2g |
| Protein | 10g |
| Calcium | 200mg |
| Iron | 1.8mg |
| Vitamin A | 600IU |
| Vitamin C | 2mg |
Storage and Reheating
One of the benefits of this recipe is that it’s almost as good reheated as it is fresh. Here’s how to store and reheat any leftovers (though I rarely have any!):
| Storage Method | Duration | Reheating Instructions |
|---|---|---|
| Room Temperature | Up to 4 hours | Cover with foil and place in a 300°F oven for 5-10 minutes |
| Refrigerator | Up to 3 days | Wrap in foil and reheat in a 325°F oven for 10-15 minutes |
| Freezer | Up to 1 month | Thaw in refrigerator overnight, then reheat covered at 325°F for 15-20 minutes |
For the best texture when reheating, I recommend adding a small pat of butter on top before putting it in the oven. This helps restore some of the moisture that may have been lost during storage.
Variations to Try
Once you’ve mastered the basic recipe, there are countless variations to explore:
Sweet and Savory Combo
- Add 2 tablespoons of honey to the butter mixture
- Include some diced apple and crumbled bacon with the cheese
Mediterranean Style
- Mix in 1/4 cup of chopped Kalamata olives
- Add 2 tablespoons of sun-dried tomato pesto to the butter
- Use feta instead of some of the cheddar
Spicy Mexican Twist
- Add 1 tablespoon of taco seasoning to the butter
- Include diced jalapeños and pepper jack cheese
- Serve with guacamole and sour cream for dipping
Breakfast Version
- Layer in scrambled eggs and cooked breakfast sausage
- Use more cheddar and less mozzarella
- Drizzle with maple syrup before serving
| Variation | Key Ingredients | Perfect Pairing |
|---|---|---|
| Classic | Garlic, herbs, mozzarella | Marinara sauce |
| Mediterranean | Olives, feta, sun-dried tomatoes | Greek salad |
| Spicy | Jalapeños, pepper jack, taco seasoning | Chili con carne |
| Breakfast | Eggs, sausage, cheddar | Fresh fruit |
Common Mistakes to Avoid
Through years of making this recipe, I’ve identified several pitfalls that can stand between you and garlic bread perfection:
- Cutting all the way through the bread – This makes it fall apart before serving. Always leave that bottom crust intact.
- Not using enough butter – The butter is what keeps the bread moist and flavorful. Don’t skimp on it!
- Using cold butter – Make sure your butter is properly softened so it spreads easily into all the crevices.
- Using pre-shredded cheese – These contain anti-caking agents that prevent proper melting. Grate your own for that perfect cheese pull.
- Rushing the baking process – The covered baking stage is crucial for melting the cheese without burning the top.
- Serving immediately from the oven – Give it those 5 minutes of rest time for the best texture and to avoid burnt mouths!

Frequently Asked Questions
Can I make this ahead of time? Yes! You can prepare the bread up to the point of baking, then refrigerate for up to 24 hours. When ready to serve, allow it to come to room temperature for 30 minutes, then bake as directed, adding an extra 5 minutes to the covered baking time.
What if I don’t have all the herbs listed? No problem! The herb mixture is flexible. If you’re missing one, just increase the amounts of the others or use 2 tablespoons of Italian seasoning as a substitute for all the fresh herbs.
Can I make this recipe dairy-free? Yes, you can use plant-based butter and dairy-free cheese alternatives. The texture won’t be quite the same, but it’s still delicious. I recommend using a combination of dairy-free mozzarella and cheddar-style shreds for the best results.
How do I know when the bread is done? The top should be golden brown, the cheese completely melted and bubbly, and if you have an instant-read thermometer, the center of the bread should register at least 190°F.
My bread is browning too quickly but the cheese isn’t fully melted. What should I do? Cover it loosely with aluminum foil and continue baking until the cheese is melted. This will prevent further browning while allowing the inside to heat through.
What’s the best way to serve this at a party? I recommend keeping it in the baking dish or cast iron skillet and placing it on a trivet in the center of the table. This keeps it warm longer and makes for a dramatic presentation when guests pull pieces off.
Why This Recipe Works
I’ve spent a lot of time understanding the science behind great pull-apart bread:
- The grid cutting pattern maximizes surface area for butter and cheese while keeping the loaf intact
- The combination of different cheeses provides optimal meltability and flavor
- Baking covered first, then uncovered creates the perfect contrast between a crisp exterior and soft interior
- The ratio of butter to garlic delivers flavor without overwhelming greasiness
The result is a foolproof recipe that delivers restaurant-quality results in your home kitchen, every single time.
Final Thoughts
Cheesy pull-apart garlic bread is more than just a side dish – it’s a celebration of comfort food that brings people together. There’s something magical about gathering around a table and reaching for that perfect piece, watching the cheese stretch as everyone shares in this simple but profound culinary pleasure.
I hope this recipe becomes a favorite in your home as it has in mine. Remember, cooking is about sharing love through food, and few dishes communicate that message more clearly than a warm, fragrant loaf of cheesy garlic bread placed at the center of your table.
Happy baking!
Q&A Section
What’s the secret to getting the perfect cheese pull? The perfect cheese pull comes down to three factors: using the right cheese blend (mozzarella is non-negotiable for its stretching properties), making sure your cheese is properly melted (which requires adequate baking time), and serving the bread while it’s still warm but not scorching hot. I also recommend grating your own cheese rather than using pre-packaged shredded varieties, as the anti-caking agents in packaged cheese can inhibit proper melting.
Can I use a bread machine to make the dough? Absolutely! If you have a bread machine, you can use it for the dough cycle. Simply add all the dough ingredients in the order recommended by your bread machine manufacturer, run the dough cycle, then proceed with shaping and filling as directed in the recipe. This is a great time-saver that doesn’t compromise on quality.
How do I prevent my garlic from burning and becoming bitter? Garlic can indeed turn bitter if it burns. The key is using softened butter (not melted) mixed with raw garlic, which protects the garlic during baking. Also, the initial covered baking period allows the garlic to cook gently before being exposed to direct heat. If you’re particularly sensitive to bitter garlic, you can sauté the minced garlic in a tablespoon of butter over low heat for 1-2 minutes until fragrant but not browned, then cool before adding to the butter mixture.
What can I do with any leftover garlic butter? Leftover garlic butter is culinary gold! Store it in an airtight container in the refrigerator for up to a week or freeze it for up to 3 months. You can use it to make quick garlic bread with regular toast, stir it into pasta for an instant sauce, melt it over grilled or roasted vegetables, or use it to baste chicken or fish before cooking.
Is there a way to make this recipe healthier without sacrificing taste? While this recipe is definitely an indulgence, you can make some modifications to reduce the calorie and fat content. Try reducing the butter by 25% and using part-skim mozzarella and reduced-fat cheddar. You can also increase the herb content for more flavor without added fat. Another option is to serve smaller portions alongside a hearty vegetable soup or salad to create a more balanced meal.
How do I create pull-apart bread with perfectly consistent pieces? Consistency in your cuts is key. I recommend using a ruler as a guide for your first few attempts. Place it alongside the bread as you make your parallel cuts to ensure they’re evenly spaced. A sharp serrated knife is essential—if your knife is dull, it will tear rather than cut the bread, leading to uneven pieces. Finally, take your time with the cutting process; this isn’t a step to rush.
What’s the best bread to use if I’m going the store-bought route? For store-bought bread, look for a round, unsliced loaf with a firm but not too dense texture. Sourdough provides excellent flavor and structure, while Italian bread offers a softer texture. Avoid very crusty artisan breads as they can become too hard when rebaked, and steer clear of very soft breads like sandwich loaves which won’t hold their shape. Most supermarket bakery sections offer suitable options labeled as “round loaf” or “boule.”
Can I make individual pull-apart rolls instead of one large loaf? Yes! This is a fantastic option for portion control or individual servings. Use dinner rolls arranged in a baking dish, cutting a grid pattern into each roll without cutting through the bottom. Proceed with the butter and cheese as directed, but reduce the baking time to about 10 minutes covered and 5-7 minutes uncovered. This makes a great option for dinner parties or buffets where guests can take their own portion.