There’s something magical about the aroma of garlic butter wafting through my kitchen. It’s one of those scents that instantly makes everyone in the house ask, “What’s cooking?” And when that garlic butter is coating perfectly seared chicken? Well, that’s a dinner worth getting excited about.
I’ve been perfecting my garlic butter chicken recipe for years, and I’m thrilled to share it with you today. This isn’t just any chicken dish – it’s a juicy, flavor-packed meal that comes together in one pan and never fails to impress. The best part? You probably already have most of the ingredients in your kitchen.
Why This Garlic Butter Chicken Is Different
Before diving into the recipe, let me tell you why this particular version stands out. I’ve tested countless garlic chicken recipes, and most of them fall short in one crucial way: the garlic flavor doesn’t fully infuse into the chicken. Instead, it sits on top, never quite becoming one with the meat.
My method solves this problem by creating a garlic-infused butter that seeps into the chicken as it cooks, ensuring every bite is packed with flavor. I also use a combination of dried and fresh garlic for a layered, complex taste that’s simply irresistible.
The Perfect Garlic Butter
The star of this dish is undoubtedly the garlic butter. This isn’t just about mixing minced garlic with butter – there’s an art to creating the perfect blend that balances richness with punchy garlic notes.
Components of Perfect Garlic Butter:
Butter type : I recommend using unsalted European-style butter with at least 82% fat content. The higher fat percentage creates a richer flavor and better texture.
Garlic preparation : Using a combination of minced fresh garlic and roasted garlic creates depth of flavor. The fresh provides sharpness, while roasted adds sweetness.
Herbs : Fresh herbs like parsley, thyme, and chives elevate the butter from good to extraordinary.
Acid balance : A tiny squeeze of lemon juice brightens the entire mixture without making it taste lemony.
Seasoning : Salt and freshly ground black pepper are essential, but a pinch of crushed red pepper flakes adds a subtle heat that wakes up your taste buds.
Ingredients You’ll Need
For the perfect garlic butter chicken, quality ingredients make all the difference. Here’s what you’ll need to serve 4 people:
For the Chicken:
- 4 boneless, skinless chicken breasts (about 2 pounds total)
- 1 tablespoon olive oil
- 1 teaspoon kosher salt
- 1/2 teaspoon freshly ground black pepper
- 1/2 teaspoon garlic powder
- 1/2 teaspoon paprika (sweet or smoked)
- 1/4 teaspoon dried thyme
For the Garlic Butter Sauce:
- 6 tablespoons unsalted butter
- 8 cloves garlic, minced (about 3 tablespoons)
- 2 cloves roasted garlic, mashed
- 1 tablespoon fresh parsley, finely chopped
- 1 teaspoon fresh thyme leaves
- 1 tablespoon fresh chives, chopped
- 1 teaspoon lemon juice
- 1/4 teaspoon crushed red pepper flakes
- 1/2 teaspoon kosher salt
- 1/4 cup chicken broth (low sodium)
- 2 tablespoons heavy cream (optional, for a richer sauce)
Step-by-Step Instructions
Making this garlic butter chicken is surprisingly simple, but each step matters for the best results. Let me walk you through the process:
Prepare the Chicken:
- Take the chicken breasts out of the refrigerator 20 minutes before cooking to bring them to room temperature.
- Pat the chicken dry with paper towels. This step is crucial for getting a good sear.
- If the chicken breasts are very thick, butterfly them or pound them to an even thickness of about 1/2 inch.
- In a small bowl, mix the salt, pepper, garlic powder, paprika, and dried thyme.
- Season both sides of the chicken breasts evenly with this spice mixture.
Create the Perfect Sear:
- Heat a large skillet (preferably cast iron) over medium-high heat until it’s very hot.
- Add the olive oil and swirl to coat the pan.
- Carefully place the seasoned chicken breasts in the hot skillet, presentation side down.
- Cook without moving for 5-6 minutes, until a golden-brown crust forms.
- Flip the chicken and cook for another 5-6 minutes, or until the internal temperature reaches 155°F (it will continue cooking to the safe 165°F as it rests).
- Transfer the chicken to a plate and tent loosely with foil.
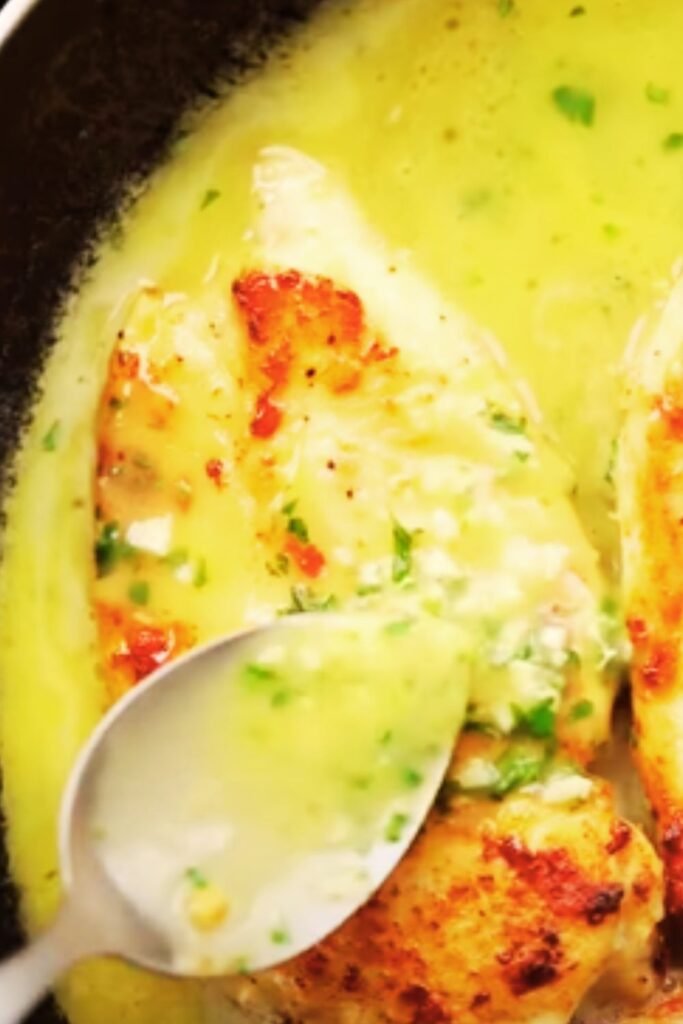
Make the Garlic Butter Sauce:
- Reduce the heat to medium-low.
- Add 2 tablespoons of butter to the same skillet, allowing it to melt.
- Add the minced fresh garlic and cook for 30 seconds, stirring constantly so it doesn’t burn.
- Add the mashed roasted garlic and stir to combine.
- Pour in the chicken broth and use a wooden spoon to scrape up any flavorful browned bits from the bottom of the pan.
- Add the remaining 4 tablespoons of butter, herbs, lemon juice, red pepper flakes, and salt.
- Simmer for 2-3 minutes until the sauce has reduced slightly.
- If using, stir in the heavy cream and simmer for another minute.
Finish the Dish:
- Return the chicken to the skillet, along with any accumulated juices.
- Spoon the garlic butter sauce over the chicken.
- Cook for another 1-2 minutes, basting the chicken with the sauce until it’s fully coated and heated through.
- Sprinkle with additional fresh herbs before serving.

Temperature Guide for Perfect Chicken
Getting the temperature right is the key to juicy chicken. Here’s a comprehensive guide to ensure your chicken is perfectly cooked:
| Internal Temperature | Result | Best For |
|---|---|---|
| 150-155°F | Very juicy, slightly pink near bone | Dark meat dishes where carryover cooking will reach 165°F |
| 160°F | Juicy, white meat | Recommended for most chicken dishes |
| 165°F | Safe, fully cooked | USDA minimum safe temperature |
| 170-175°F | Beginning to dry out | Only suitable for braised or slow-cooked dishes |
| 180°F+ | Dry, tough | Avoid unless making pulled chicken |
For this garlic butter chicken recipe, I aim for 160°F at the thickest part before removing it from the heat. The temperature will continue to rise a few degrees as the chicken rests.
Common Mistakes to Avoid
Even experienced cooks can make these errors when preparing garlic butter chicken. Here’s how to avoid them:
Mistake 1: Not Drying the Chicken
Wet chicken steams rather than sears. Always pat your chicken completely dry with paper towels before seasoning.
Mistake 2: Cold Chicken in a Hot Pan
Taking chicken straight from the refrigerator to a hot pan causes uneven cooking. Let it sit at room temperature for 15-20 minutes first.
Mistake 3: Overcrowding the Pan
Give each piece of chicken enough space to sear properly. Cook in batches if necessary.
Mistake 4: Burning the Garlic
Garlic burns easily and becomes bitter. Add it to the pan only after reducing the heat and watch it carefully.
Mistake 5: Not Letting the Chicken Rest
Cutting into chicken immediately after cooking allows all the juices to escape. Always rest for 5 minutes under loose foil.
Variations to Try
The beauty of this garlic butter chicken recipe is its versatility. Here are some delicious variations I’ve experimented with:
Lemon Garlic Butter Chicken
Add the zest of one lemon to the butter mixture and increase the lemon juice to 1 tablespoon. Finish with thin lemon slices on top.
Herb-Crusted Garlic Butter Chicken
Before cooking, press the chicken into a mixture of finely chopped fresh herbs (rosemary, thyme, parsley) mixed with breadcrumbs for a crispy coating.
Mushroom Garlic Butter Chicken
After removing the chicken, sauté 8 ounces of sliced mushrooms in the pan before making the garlic butter sauce. Continue with the recipe as directed.
Spicy Garlic Butter Chicken
Double the red pepper flakes and add 1/2 teaspoon of cayenne pepper to the chicken seasoning for a dish with serious heat.
Sun-Dried Tomato Garlic Butter Chicken
Add 1/4 cup of chopped sun-dried tomatoes to the garlic butter sauce for a tangy, slightly sweet variation.
Nutritional Profile
Understanding the nutritional content of what you’re eating is important. Here’s the breakdown for one serving of this garlic butter chicken:
| Nutrient | Amount per Serving | % Daily Value |
|---|---|---|
| Calories | 385 | – |
| Protein | 38g | 76% |
| Total Fat | 24g | 37% |
| Saturated Fat | 12g | 60% |
| Cholesterol | 165mg | 55% |
| Carbohydrates | 3g | 1% |
| Fiber | 0.5g | 2% |
| Sugars | 0.5g | – |
| Sodium | 685mg | 29% |
| Potassium | 520mg | 15% |
| Vitamin A | 550IU | 11% |
| Vitamin C | 8mg | 13% |
| Calcium | 30mg | 3% |
| Iron | 1.5mg | 8% |
*Values are approximate and may vary based on specific ingredients used.
Serving Suggestions
This garlic butter chicken pairs beautifully with a variety of sides. Here are my favorite pairings:
Carb Options:
- Creamy mashed potatoes to soak up the delicious sauce
- Buttered egg noodles tossed with a bit of the garlic sauce
- Crusty artisan bread for dipping
- Wild rice pilaf for a nutty contrast
- Roasted garlic bread for garlic lovers
Vegetable Sides:
- Roasted asparagus
- Sautéed green beans with slivered almonds
- Simple side salad with balsamic vinaigrette
- Roasted Brussels sprouts
- Steamed broccoli
For a Complete Meal:
- Serve the chicken over a bed of creamy polenta
- Add a side of roasted vegetables tossed in olive oil, salt, and pepper
- Finish with a simple lemon wedge for tableside squeezing
Make-Ahead and Storage Tips
This garlic butter chicken works wonderfully for meal prep. Here’s how to make it ahead and store it properly:
Make-Ahead Options:
Season the chicken : You can season the chicken up to 24 hours in advance. Keep it covered in the refrigerator until you’re ready to cook.
Prepare the garlic butter : The compound butter can be made up to 3 days ahead. Store it wrapped in parchment paper in the refrigerator. Let it come to room temperature before using.
Complete meal prep : The entire dish can be made 2 days ahead. Reheat gently on the stovetop with a splash of chicken broth.
Storage Guidelines:
Refrigeration : Store leftover chicken in an airtight container for up to 3 days. The butter sauce may solidify when cold, but will melt when reheated.
Freezing : While you can freeze this dish for up to 2 months, the texture of the sauce may change slightly upon thawing. Freeze in individual portions for best results.
Reheating : The best way to reheat this chicken is in a skillet over low heat with a lid. Add a tablespoon of chicken broth to revive the sauce.
Budget-Friendly Tips
This garlic butter chicken feels luxurious, but it doesn’t have to break the bank. Here are my tips for making it more budget-friendly:
Cost-Cutting Strategies:
Chicken options : Chicken thighs are often cheaper than breasts and actually work beautifully in this recipe, bringing more flavor and moisture.
Butter alternatives : While European butter is ideal, any unsalted butter will work well. Just add a pinch more salt to compensate.
Garlic savings : If fresh garlic is expensive, jarred minced garlic works in a pinch. Use 1/2 teaspoon per clove called for in the recipe.
Herb substitutions : Dried herbs can replace fresh at a ratio of 1 teaspoon dried to 1 tablespoon fresh.
Batch cooking : Double the recipe and use the leftovers for lunches, significantly reducing the per-serving cost.
Frequently Asked Questions
I’ve received many questions about this recipe over the years. Here are the answers to the most common ones:
Q: Can I use chicken thighs instead of breasts? Absolutely! Boneless, skinless chicken thighs work wonderfully in this recipe. They’ll need roughly the same cooking time but are even more forgiving if slightly overcooked.
Q: How can I tell when the chicken is done without a thermometer? While a thermometer is best, you can also check by cutting into the thickest part. The meat should be opaque throughout with no pink, and the juices should run clear.
Q: Can I use salted butter instead of unsalted? Yes, but reduce the added salt in the recipe by at least half to compensate.
Q: What if my sauce breaks or looks curdled? This usually happens if the heat is too high. Remove from heat immediately and whisk in 1-2 teaspoons of cold water to re-emulsify the sauce.
Q: Is there a dairy-free alternative? You can use a high-quality plant-based butter substitute and coconut cream instead of heavy cream. The flavor will be slightly different but still delicious.
Q: Can I add vegetables directly to this dish? Yes! Spinach, cherry tomatoes, and mushrooms all work well. Add them when you return the chicken to the pan.
Q: How spicy is this dish? As written, it has just a hint of heat from the red pepper flakes. For a completely mild version, omit them entirely.
Q: Can I use this garlic butter on other proteins? Absolutely! This same sauce works beautifully with shrimp, salmon, pork chops, or even a good steak.
Why This Recipe Works Every Time
After years of making this dish, I’ve identified exactly what makes it foolproof:
- The dual garlic approach: Using both fresh and roasted garlic creates a balanced flavor that’s bold but not overwhelming.
- The searing technique: Getting a proper sear before creating the sauce locks in juices and creates the foundation for flavor.
- The butter-to-chicken ratio: The recipe uses just enough butter to create a luscious sauce without becoming greasy.
- The resting period: Allowing the chicken to rest before serving ensures the juices redistribute throughout the meat.
- The deglazing step: Using chicken broth to scrape up the browned bits from the pan incorporates all the flavor into the sauce.
The first time I made this recipe, I was cooking for friends who claimed they were “tired of chicken.” After one bite, they asked for the recipe, and it’s been in regular rotation for them ever since. That’s the true test of a great dish – it can make even the most jaded diners excited about dinner again.
Whether you’re cooking for a special occasion or just a Tuesday night, this garlic butter chicken delivers restaurant-quality results with minimal effort. It’s the perfect example of how a few quality ingredients, treated with care, can transform an everyday protein into something truly memorable.
Give this recipe a try, and I guarantee it will become one of your favorites too. There’s something undeniably satisfying about watching people’s eyes light up when they take their first bite of something you’ve made – and this garlic butter chicken never fails to create that moment.
Final Cooking Notes
Before you head to the kitchen, here are a few final tips from my years of making this dish:
- Let the skillet get properly hot before adding the chicken. You should see wisps of smoke rising from the pan.
- Don’t be tempted to add extra garlic butter sauce ingredients early. Building the flavors in stages is key.
- For an extra-special touch, finish with a sprinkle of flaky sea salt just before serving.
- If you’re using the optional cream, make sure it’s at room temperature to prevent the sauce from breaking.
- The sauce will continue to thicken as it cools, so if it seems slightly thin when you’re done cooking, don’t worry – it will be perfect by the time it reaches the table.
Happy cooking, and enjoy!